Introduction to Homemade Butterfingers
Creating your own homemade Butterfingers is an experience that combines nostalgia with the joy of cooking. Why settle for store-bought when you can whip up these delightful treats right in your kitchen? Not only do they offer a richer, creamier taste, but making them at home allows you to customize the flavors to your liking. Plus, who wouldn’t want to impress friends and family with their very own candy creation?
Why Homemade Butterfingers Are a Must-Try
First off, let’s talk about freshness. Homemade Butterfingers are made with simple ingredients that you probably already have at home, like peanut butter, chocolate, and crisp rice cereal. As many health experts emphasize, reducing processed ingredients in your diet can lead to better overall health. By making them yourself, you control everything that goes in, ensuring a natural and fulfilling treat.
But it doesn’t stop there! Have you ever looked at the ingredient list on a typical candy bar? It can be daunting. With homemade Butterfingers, you know exactly what you’re enjoying, making them not only delicious but also a more wholesome choice. For excellent tips on ingredient selection and healthy eating habits, resources like Healthline provide solid advice on cleaner eating.
One of the best parts about making homemade candy is the opportunity to get creative. Whether you prefer an extra crunch from some chopped nuts or a hint of sea salt for contrast, the possibilities are endless. And let’s be real—most people recall the joy of biting into a Butterfinger and feeling that satisfying crunch followed by velvety chocolate. By opting for homemade, you can achieve that same delightful experience without the preservatives and additives found in store-bought varieties.
Moreover, making homemade Butterfingers could become a fun group activity. Invite your friends over for a candy-making night, and you’ll create not just treats but also memories! As you gather in the kitchen, you can share stories, deepen connections, and perhaps even launch a mini candy competition. It’s all about enjoying the process as much as the sweet results.
So, ready to dive into the world of homemade candy? Let’s get started on crafting the perfect homemade Butterfingers that will surely leave your taste buds wanting more!
Ingredients for Homemade Butterfingers
Essential Ingredients
Crafting your own homemade Butterfingers at home is not only fun but also lets you control the quality. Here’s what you need for that crispy, peanut-buttery goodness:
- Peanut Butter: Choose creamy or crunchy based on your preference. Natural peanut butter works well for a healthier twist.
- Confectioners’ Sugar: This is key for achieving that signature sweetness and texture.
- Butter: Unsalted butter helps balance out the flavors. The fat is essential for that rich mouthfeel.
- Chocolate Chips: Semi-sweet chocolate is commonly used, but you can also experiment with dark or milk chocolate for a custom taste.
- Crispy Cereal: Like Rice Krispies or cornflakes, they give your Butterfingers that delightful crunch.
Optional Additions
To customize your homemade Butterfingers, consider these tasty add-ins:
- Sea Salt: A sprinkle can enhance the flavors, lending that sweet-and-salty combo everyone loves.
- Vanilla Extract: Just a drop can amplify the richness of your filling.
- Almonds or Nuts: For a different texture and added health benefits, experiment with finely chopped nuts.
Whipping these ingredients together is a breeze, making it perfect for your next snack-time adventure. You can learn more about nut usage in candy-making here. So, what are you waiting for? Get those ingredients ready and dive into making some delightful homemade Butterfingers!
Preparing Homemade Butterfingers
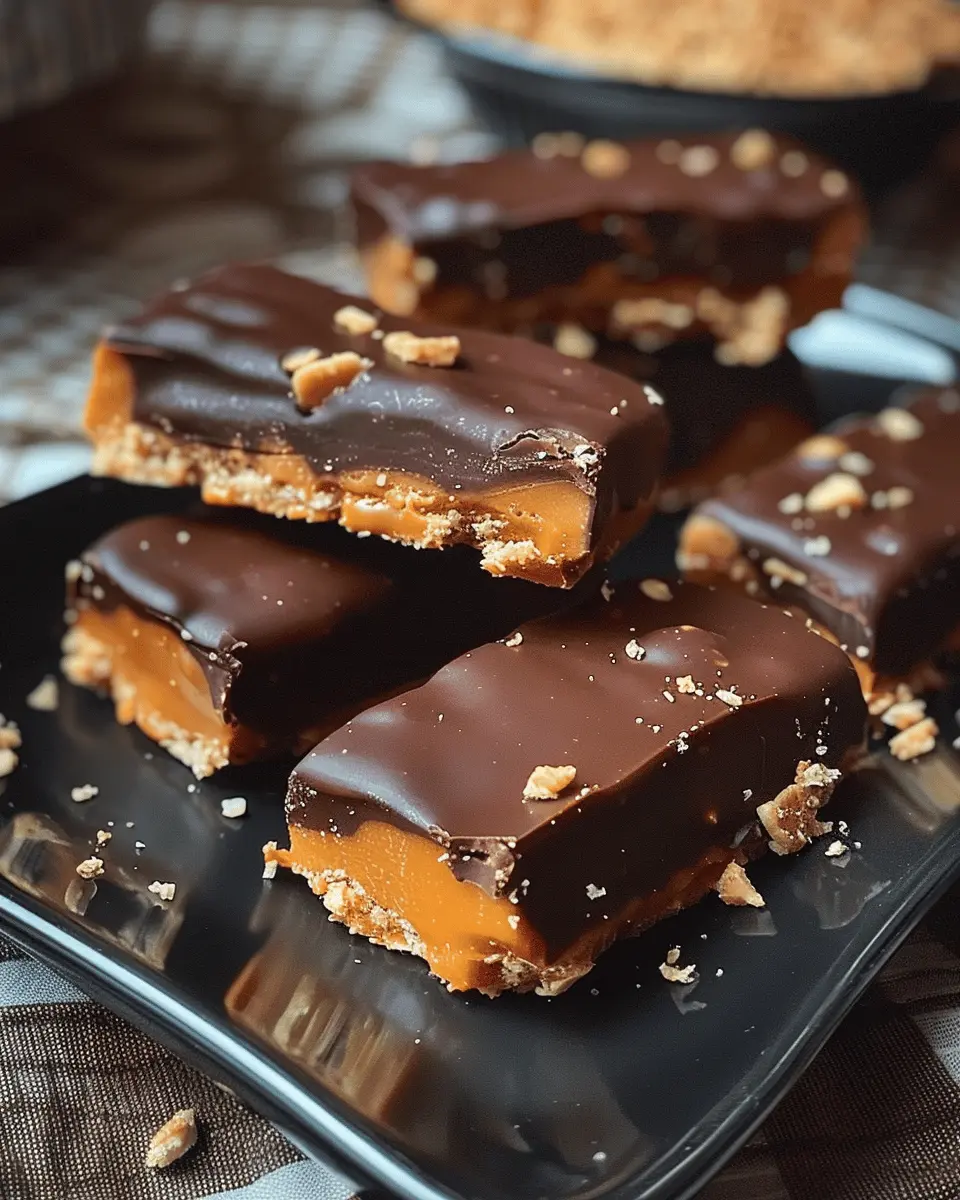
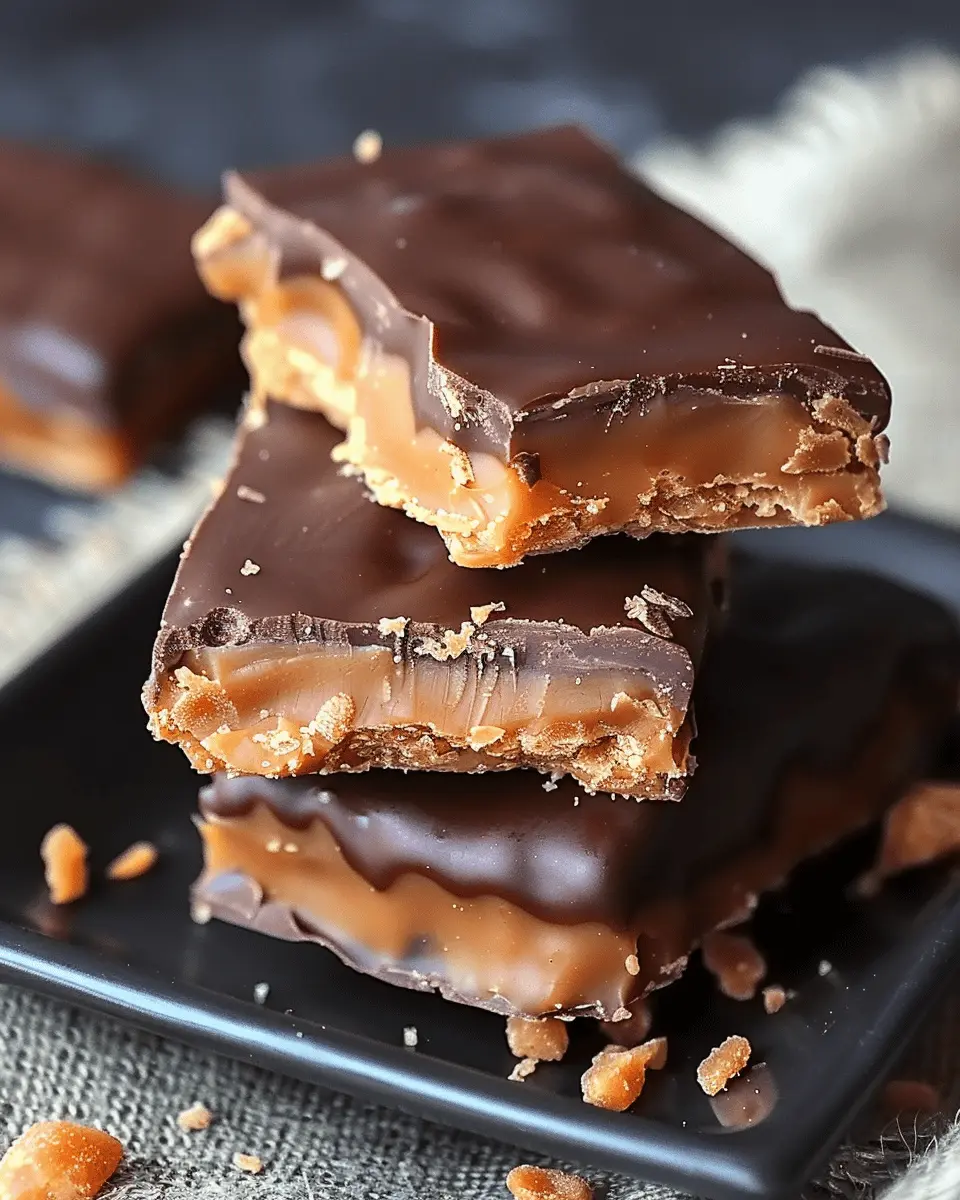
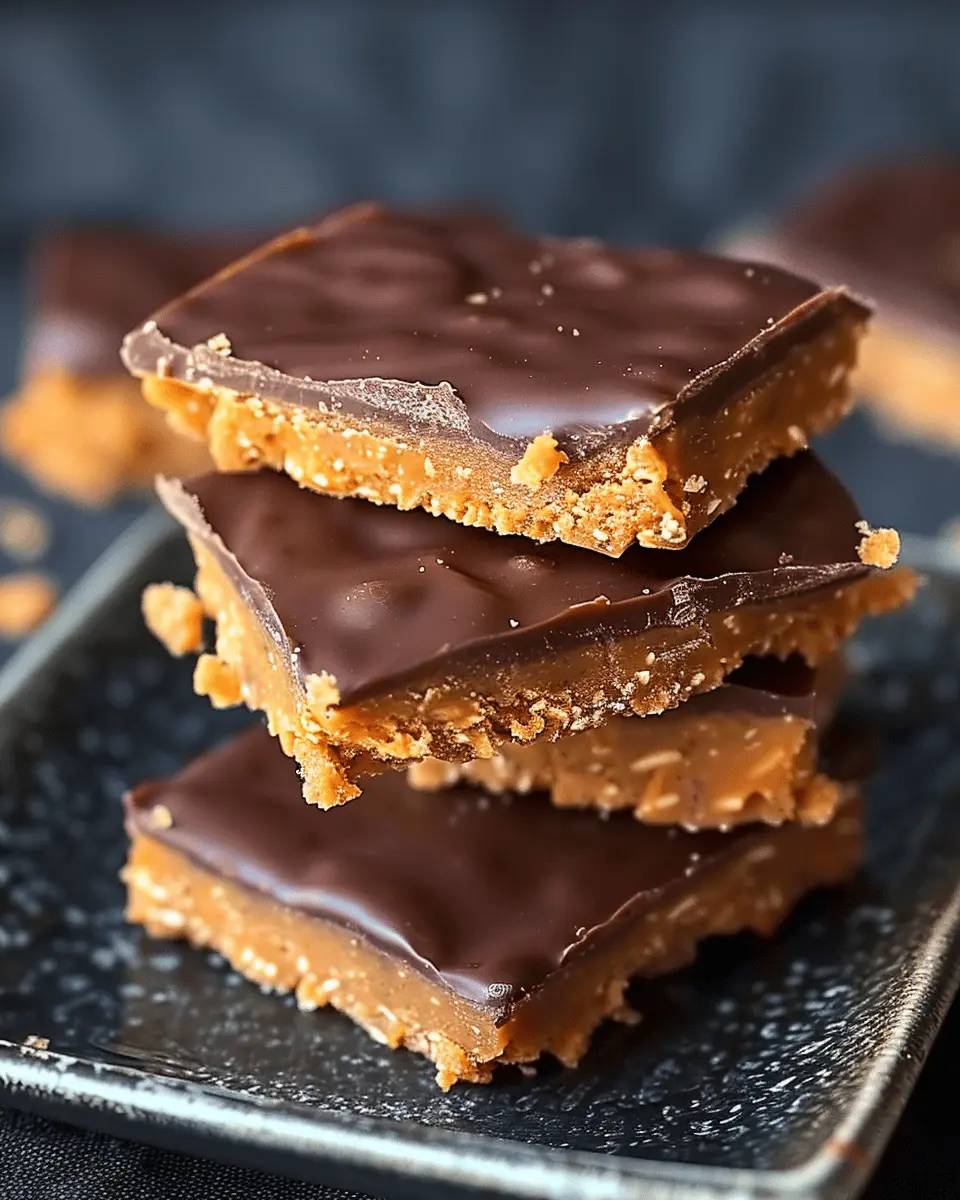
Homemade Butterfingers are a delightful treat that combines a crunchy peanut butter center with a rich chocolate coating. Making them from scratch is easier than you might think. Let’s break down the process into simple steps, ensuring you have all the tips and tricks necessary to create this nostalgic candy in your kitchen.
Gather Your Ingredients and Equipment
Before diving into the world of homemade Butterfingers, it’s crucial to gather everything you need. Here’s a handy checklist:
Ingredients:
- 1 cup of peanut butter (creamy or crunchy, depending on your preference)
- 2 cups of powdered sugar
- 1 cup of candy corn
- 2 cups of chocolate chips (dark, milk, or a mix)
- 1 tablespoon of vegetable oil (to thin the chocolate)
Equipment:
- A microwave-safe bowl
- A mixing spatula or wooden spoon
- A parchment-lined baking tray
- A sharp knife or pizza cutter for slicing
Having everything at the ready will streamline your candy-making adventure and increase your chances of success. Plus, it’s always nice to check things off your list!
Making the Peanut Butter Mixture
Now that you’re prepped and ready, it’s time to create the perfect peanut butter base. Start by heating the candy corn in a microwave-safe bowl. Microwave it for about 30 seconds at a time, stirring in between intervals until fully melted. Be careful not to overheat it, as candy corn can become a bit temperamental.
Once melted, mix in the peanut butter until everything is perfectly blended. The combination should be smooth and glossy. Then, gradually add the powdered sugar—one cup at a time—stirring until it’s well incorporated. You’ll notice the mixture becoming thicker. This is precisely what we want; a dense, fudge-like texture that will hold its shape.
Pour and Cool the Mixture
With your peanut butter mixture ready, it’s time to pour it onto your prepared baking tray. Spread the mixture evenly, aiming for about a half-inch thickness. You can use a spatula to smooth it out nicely.
Once spread, let it cool at room temperature for about 30 minutes to an hour. If you’re in a hurry, you can place it in the fridge for about 15-20 minutes instead. Cooling helps the mixture firm up, making it easier to slice into bars later on.
Cut the Bars
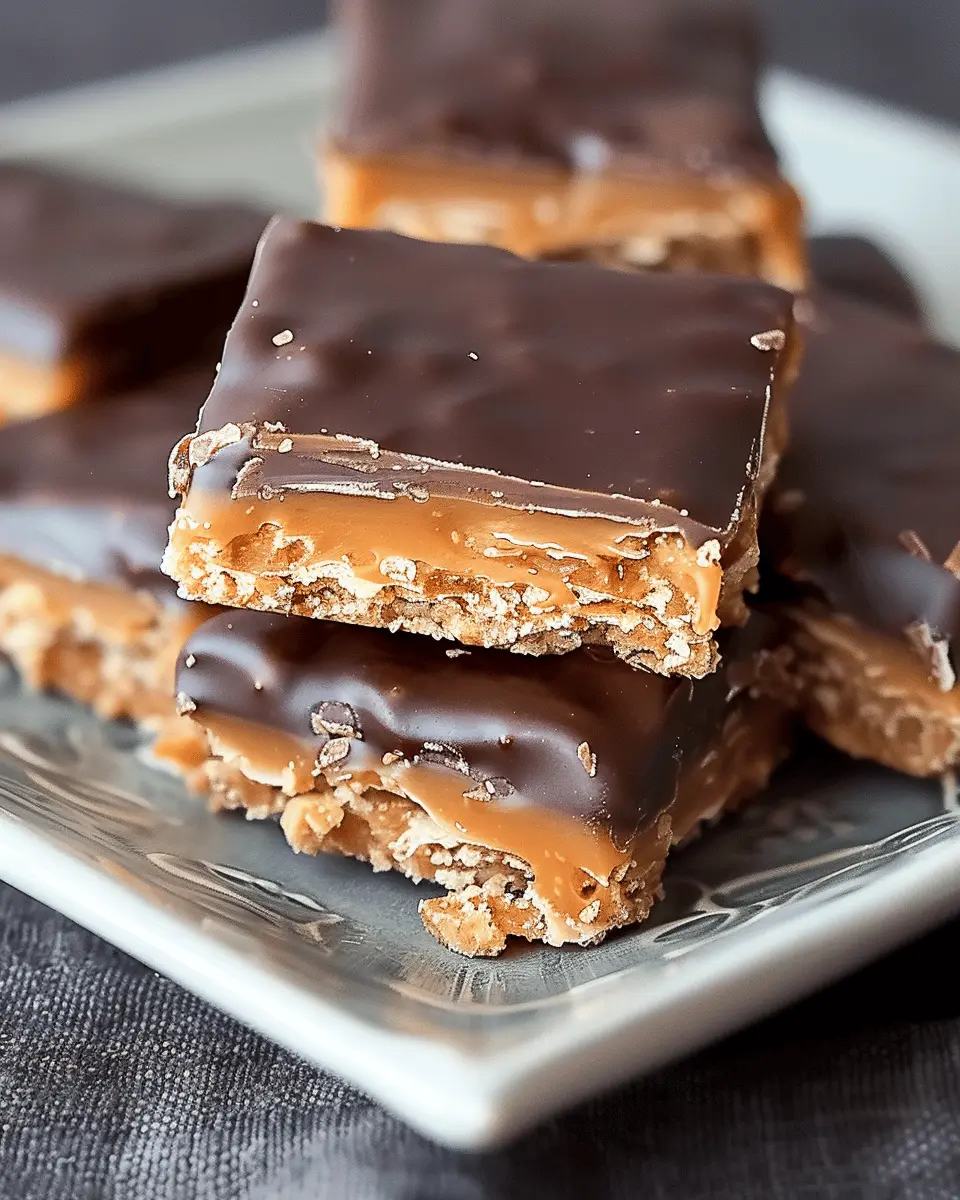
After your mixture has cooled and set, it’s time to slice it into bars. Use a sharp knife or a pizza cutter for straight, even lines. Do you prefer larger pieces or snack-sized morsels? That’s entirely up to you! Whatever your choice, ensure the bars maintain a consistent size for an appealing presentation.
Once cut, you can layer the bars on a serving platter or keep them on the tray while you prepare for the final, most rewarding part – the chocolate dip.
Dip in Chocolate
Melt your chocolate chips with the vegetable oil in the microwave. Heat in short bursts of about 30 seconds, stirring after each until it’s completely smooth. The addition of oil will help the chocolate become silkier and easier to coat your Butterfinger bars evenly.
Carefully dip each bar into the melted chocolate, making sure to cover all sides. Allow any excess chocolate to drip off before placing them back onto the parchment paper. Once all the bars are coated, let them sit at room temperature until the chocolate hardens or, quicker yet, pop them in the fridge for around 10 minutes.
As you indulge in your homemade Butterfingers, consider how simple it was to recreate this classic candy. The next time you’re craving something sweet, why not treat yourself to a little homemade magic? Plus, it makes for a fantastic conversation starter when sharing with friends.
For more tips on chocolate melting methods or variations to try, check out this useful guide on melting chocolate from Allrecipes. Happy candy making!
Variations on Homemade Butterfingers
When it comes to homemade Butterfingers, the possibilities are endless! You can get creative with your ingredients and customize the flavors to suit your taste. Here are some variations that will keep your treat game strong!
Classic Chocolate Coating
The traditional coating for homemade Butterfingers is, of course, milk chocolate. To achieve that smooth, glossy finish, simply melt chocolate chips in a microwave or a double boiler. Dip your crunchy peanut butter center into the melted chocolate, then let them cool on parchment paper. This classic version never disappoints!
White and Dark Chocolate Alternatives
Feeling adventurous? Try using white or dark chocolate for a delightful twist! White chocolate brings a creamy sweetness that pairs wonderfully with the crunchy peanut butter center. Dark chocolate, with its richer flavor, offers a more sophisticated taste experience. Just like this article on The Chocolate Life, experimenting with different chocolate types can elevate your creations to gourmet status!
Nutty Butterfingers
For all you nut lovers out there, why not add some extra crunch? Incorporating chopped nuts—like almonds, hazelnuts, or even pistachios—into your homemade Butterfingers gives them a delightful texture and a flavor boost. Toss the nuts right into the peanut butter mixture for an extra dimension of taste that will impress everyone at your next gathering.
With these variations, your homemade treats can cater to any sweet tooth! Are you ready to treat yourself?
Cooking Tips and Notes for Homemade Butterfingers
Achieving the Perfect Texture
To create the ultimate homemade Butterfingers, texture is key. Aim for a crunchy yet melt-in-your-mouth consistency. When melting your ingredients, stir continuously to ensure an even melt — no one likes a clumpy mess! After combining the peanut butter and sugar, let the mixture cool slightly before forming it into bars. This will help them hold their shape and create that signature Butterfinger crunch.
Troubleshooting Common Issues
We’ve all had kitchen mishaps, and making homemade Butterfingers is no exception. Here are some tips to keep you on track:
- Separation: If your peanut butter mixture starts to separate, it might be too warm. Simply allow it to cool a bit before shaping.
- Too Sticky: If bars are sticking to your hands, try using a bit of cooking spray – it works wonders!
Feeling a bit anxious about making these treats? Check out this guide on candy making for additional tips and techniques to perfect your confectionery skills! Cooking should be fun, so don’t stress — you got this!
Serving Suggestions for Homemade Butterfingers
Creating homemade Butterfingers is just the beginning of the fun! Serving them in delightful ways can enhance the experience for you and your guests.
Creative Ways to Serve
Think outside the candy box! Here are a few imaginative ideas to present your homemade Butterfingers:
- Crispy Coated Bites: Cut your Butterfingers into bite-sized pieces and dip them in melted chocolate, then sprinkle with crushed nuts or sprinkles for a festive touch.
- Dessert Platter: Arrange your homemade treats on a colorful platter alongside other sweets like brownies or cookies for a fun dessert spread.
- Ice Cream Toppers: Crumble Butterfinger pieces over your favorite ice cream to add a crunchy layer of flavor. It’s a surefire way to impress guests!
Pairing with Beverages
Pairing your homemade Butterfingers with the right beverages can elevate your snack time:
- Milk: Nothing beats the classic pairing of cold milk with candy. The creaminess complements the crunchy center perfectly.
- Coffee or Cold Brew: The rich flavors of coffee can pair wonderfully with the sweetness of your Butterfingers, making for a delightful afternoon treat.
- Fruit-infused Sparkling Water: If you want something refreshing, try pairing with a sparkling water infused with citrus or berries. It’s a light, delightful contrast that will balance the sweetness.
Experiment with these ideas, and you’ll find serving your homemade Butterfingers can be just as fun as making them! For more tips and tricks on serving snacks, check out resources like Food & Wine or Bon Appétit.
Time Breakdown for Homemade Butterfingers
Preparation Time
Getting started on your homemade Butterfingers doesn’t take too long—about 30 minutes. You’ll need this time to gather your ingredients, line your baking dish, and mix up the peanut butter and sugar. If you can spare a few moments to set everything up, you’ll be rewarded with deliciousness.
Cooking Time
While you’ll spend about 10 minutes melting and mixing, the most critical part is letting them cool. After all, patience is a virtue! You’ll need another hour for cooling to ensure your butterfingers set perfectly.
Total Time
In total, from start to finish, you’re looking at just around 1 hour and 40 minutes. Trust us, the sweet crunch of your homemade Butterfingers will be worth the wait! If you want to explore more candy-making tips before diving in, check out this helpful guide on candy techniques from Serious Eats. Enjoy the process, and happy cooking!
Nutritional Facts for Homemade Butterfingers
When it comes to homemade Butterfingers, understanding their nutritional profile can help you enjoy this sweet treat more mindfully!
Calories
One serving of these delicious bars typically contains around 150–200 calories. It’s a delightful indulgence without going overboard!
Protein
These homemade Butterfingers provide about 3–5 grams of protein per serving, thanks to the peanut butter base. While they aren’t a significant protein source, they can be a satisfying treat post-workout.
Sugar
The sugar content can range from 10 to 15 grams, depending on how sweet you make the chocolate coating. Consider using lower-sugar options if you’re watching your intake.
Dietary Considerations
Great news for dietary needs! You can easily make these homemade Butterfingers gluten-free by choosing suitable crackers or using a nut-based crust. For vegan options, just swap the chocolate with dairy-free varieties.
Making informed choices allows you to enjoy treats like these while accommodating your dietary preferences. Interested in exploring more about sugar alternatives? Check out resources from the American Heart Association for tips and guides.
FAQs About Homemade Butterfingers
How long do Homemade Butterfingers last?
Once you’ve crafted your delicious homemade Butterfingers, you’ll want to savor them for as long as possible! Typically, they can last about 1 to 2 weeks when stored properly. Keep them in an airtight container at room temperature; however, if you live in a particularly warm climate, refrigeration may help maintain their freshness. For even longer storage, you can freeze them for up to three months. Just remember to wrap each piece individually in wax paper to prevent sticking!
Can I use a different type of nut butter?
Absolutely! While the classic version uses peanut butter, feel free to experiment with almond, cashew, or even sunflower seed butter. Each nut butter brings a unique flavor profile and texture. Some nut butters, like almond, might yield a slightly different taste, but that’s the fun of making homemade Butterfingers! Don’t hesitate to check out healthline.com for nutritional comparisons of various nut butters.
Is there a vegan version available?
Indeed, there is! Making homemade Butterfingers vegan is simple. Just substitute the traditional butter with coconut oil or a plant-based alternative. For the chocolate coating, opt for dairy-free chocolate chips. This way, everyone can indulge in this sweet treat without compromising their dietary preferences. If you’re curious about vegan options, consider browsing PETA’s guide on vegan baking for more inspiration!
Delving into these FAQs can enhance your homemade Butterfinger experience, ensuring you craft treats that not only taste great but last longer too!
Conclusion on Homemade Butterfingers
Final Thoughts on Making Homemade Butterfingers
Creating your own homemade Butterfingers is a delightful experience that can elevate your snacking game. Not only are you in control of the ingredients, but you also get to customize flavors to suit your taste. The crunch of the peanut butter center combined with the rich chocolate coating truly makes these treats irresistible.
If you haven’t tried making them yet, give it a shot! Imagine the joy on your friends’ faces when you share these with them. Plus, with resources like Serious Eats and Food Network offering candy-making tips, you’ll be set for success. So grab your supplies and let’s whip up some delicious homemade Butterfingers!
PrintHomemade Butterfingers: Indulgent Treat Made Easy at Home
Delight in the sweet and crunchy goodness of homemade Butterfingers, an indulgent treat that you can easily make at home.
- Prep Time: 15 minutes
- Cook Time: 15 minutes
- Total Time: 1 hour 30 minutes
- Yield: 12 servings 1x
- Category: Dessert
- Method: No-Bake
- Cuisine: American
- Diet: Vegetarian
Ingredients
- 1 cup crunchy peanut butter
- 2 cups powdered sugar
- 1 cup milk chocolate chips
- 1 tablespoon coconut oil
Instructions
- In a mixing bowl, combine the peanut butter and powdered sugar until smooth.
- Spread the mixture evenly in a lined baking pan.
- Chill in the refrigerator for about an hour.
- Once set, cut into bars.
- Melt the chocolate chips with coconut oil in a microwave-safe bowl.
- Dip each bar into the chocolate until fully coated.
- Place back on the parchment to cool and harden.
Notes
- For a crunchier texture, consider adding chopped peanuts to the peanut butter mixture.
- Experiment with different types of chocolate for dipping.
Nutrition
- Serving Size: 1 bar
- Calories: 150
- Sugar: 12g
- Sodium: 50mg
- Fat: 8g
- Saturated Fat: 3g
- Unsaturated Fat: 4g
- Trans Fat: 0g
- Carbohydrates: 18g
- Fiber: 1g
- Protein: 3g
- Cholesterol: 0mg
Keywords: Homemade Butterfingers, chocolate treat, easy candy recipe