Introduction to Chocolate Pumpkin Butter Cups
As the leaves start to turn and the air gets a little crisper, we all crave flavors that warm our hearts and satisfy our sweet tooth. Enter the chocolate pumpkin butter cups—the ultimate fall treat that perfectly captures everything we love about the season. If you enjoy indulging in rich, chocolatey goodness while embracing the essence of autumn, these delightful treats will become your new go-to recipe.
Why Chocolate Pumpkin Butter Cups are the Ultimate Fall Treat
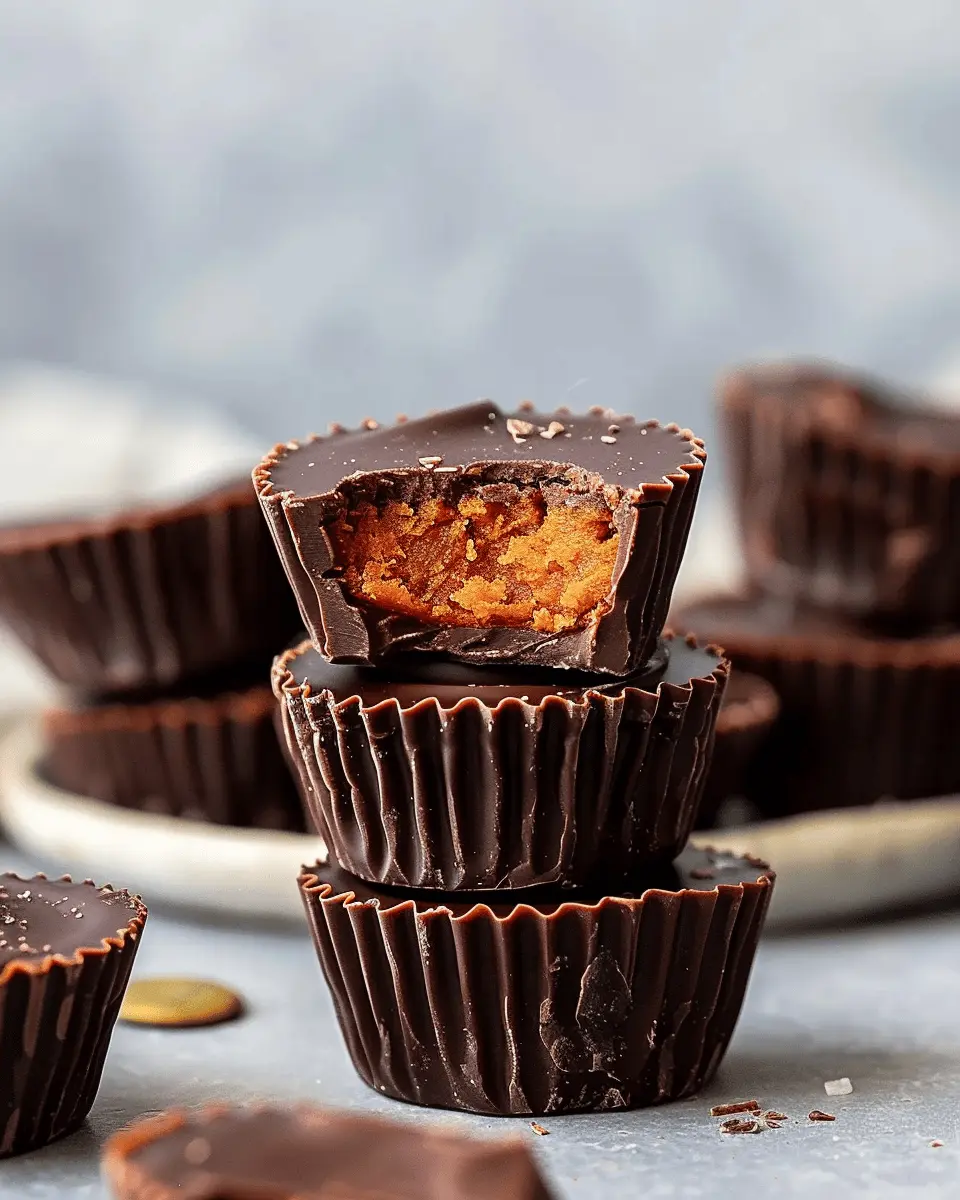
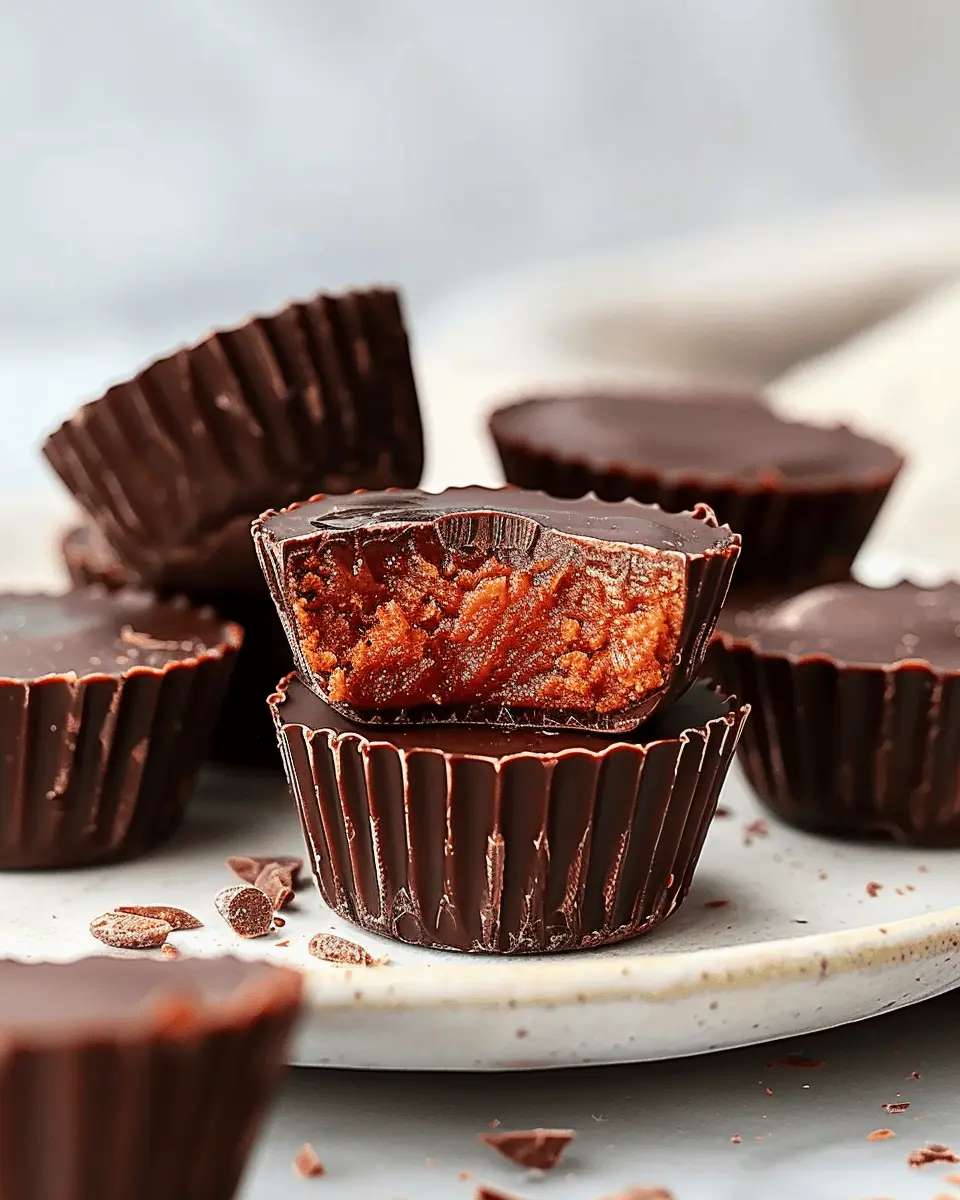
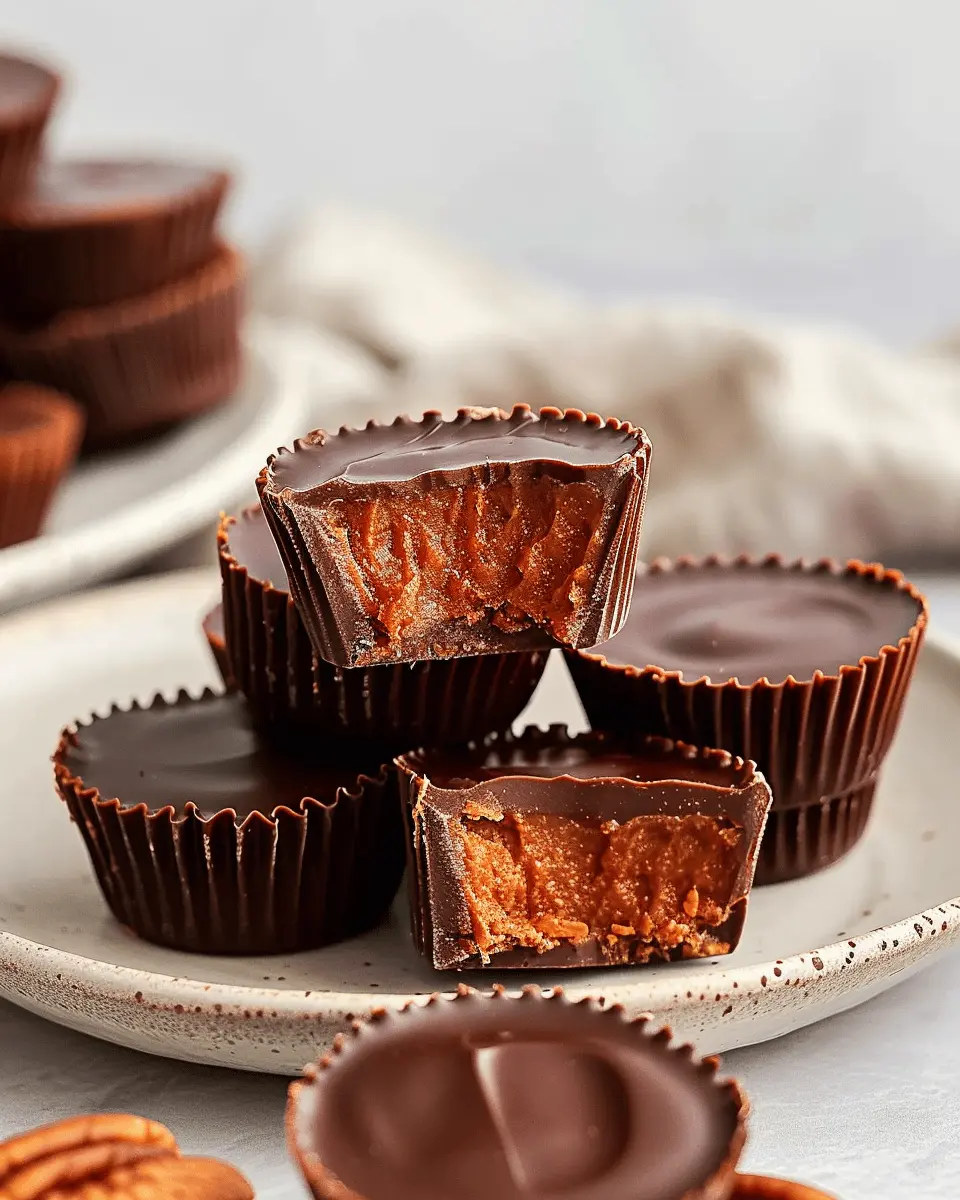
Picture this: You settle down in your coziest sweater, perhaps with a warm mug of spiced apple cider in hand, and open a box of these beautifully crafted chocolate pumpkin butter cups. The robust, creamy filling is infused with pumpkin purée and spices that echo the comfort of pumpkin pie, while a luscious layer of chocolate envelopes each bite. It’s a little taste of fall that you can enjoy any time.
But why stop at the delicious flavor? Here are a few reasons why these chocolate pumpkin butter cups are a must-make this season:
-
Nutritious Ingredients: Pumpkin is not just a tasty addition; it’s packed with vitamins and antioxidants, making this treat a guilt-free indulgence compared to traditional sweets. A single serving of pumpkin can provide you with a healthy dose of Vitamin A and fiber.
-
Perfect for Sharing: Fall is synonymous with gatherings—from Halloween parties to Thanksgiving dinners. These butter cups make the ideal dessert to share with friends and family. Imagine presenting your homemade treats at your next get-together; you’re bound to impress!
-
Customizable Flavors: Feel free to experiment! Whether you want to add a sprinkle of sea salt, incorporate some nuts, or even switch up the chocolate type (dark, milk, or white), the possibilities are endless. This versatility keeps your palate interested and opens the door for creativity.
If you’re eager to dive into this seasonal delight and discover just how easy it is to create chocolate pumpkin butter cups right in your kitchen, keep reading for the full recipe and instructions. Your fall dessert game is about to reach a whole new level!
Ingredients for Chocolate Pumpkin Butter Cups
Essential ingredients for a delicious result
Creating chocolate pumpkin butter cups is a delightful experience, especially when using quality ingredients. Here’s what you’ll need for this simple yet indulgent treat:
- Chocolate: Opt for high-quality dark or semi-sweet chocolate for a rich flavor. Aim for at least 70% cocoa for a balance of sweetness and bitterness.
- Pumpkin puree: Pure pumpkin puree is essential for that fall flavor. Ensure it’s 100% pure and not pumpkin pie filling, which has added sugars and spices.
- Nut butter: Creamy peanut butter or almond butter works beautifully. If you prefer a nut-free option, sunflower seed butter is a great alternative.
- Sweetener: Maple syrup or agave nectar will add just the right touch of sweetness without being overpowering.
- Spices: A pinch of cinnamon and nutmeg elevates the flavor, giving it that cozy autumn vibe.
These key ingredients come together to create a decadent treat that’s hard to resist!
Helpful substitutions for special diets
No need to miss out if you have dietary restrictions! Here are some easy substitutions for your chocolate pumpkin butter cups:
- Dairy-free chocolate: Choose dairy-free chocolate chips if you’re avoiding lactose. Brands like Enjoy Life are perfect for gluten-free and allergen-friendly options.
- Vegan sweetener: If you’re vegan, coconut sugar or pure maple syrup work well as substitutes for traditional sugar.
- Nut-free options: As mentioned, swapping out nut butter for sunflower seed butter caters to nut allergies without compromising flavor.
- Low-carb options: For a keto-friendly version, use sugar-free chocolate and a low-carb sweetener like erythritol or stevia.
Feel free to get creative! The beauty of cooking is tailoring recipes to fit your lifestyle. Don’t hesitate to explore different ingredients and flavors; who knows, your version might become the next hit!
Preparing Chocolate Pumpkin Butter Cups
If you’re on the lookout for a delightful treat that marries the warmth of fall flavors with the richness of chocolate, you’re in for a festive treat! Let’s dive into how to prepare chocolate pumpkin butter cups that not only satisfy your sweet tooth but also make for the perfect autumn snack or an impressive dessert at your next gathering. Buckle up, because this sweet journey is going to be scrumptious!
Gather and Prepare Your Ingredients
Before diving into the magic of making your chocolate pumpkin butter cups, it’s essential to have all your ingredients handy. Here’s what you’ll need:
-
For the pumpkin butter filling:
-
1 cup pumpkin puree (canned or fresh)
-
1/2 cup maple syrup or agave syrup
-
1 teaspoon cinnamon
-
1/2 teaspoon nutmeg
-
1/4 teaspoon cloves
-
For the chocolate mixture:
-
1 1/2 cups high-quality dark or milk chocolate chips
-
A pinch of sea salt
Not only are these ingredients straightforward, but they also promote healthy snacking. The pumpkin is rich in Vitamin A and fiber, making this a guilt-free indulgence!
Create the Pumpkin Butter Filling
Now that you have everything at your fingertips, let’s make that delectable pumpkin butter filling.
- In a medium saucepan over low heat, combine the pumpkin puree, maple syrup, cinnamon, nutmeg, and cloves.
- Stir continuously until the mixture is heated through and starts to thicken slightly (about 5-7 minutes).
- Once it reaches a spreadable consistency, remove from heat and let it cool.
This filling embodies the essence of fall! Not to mention, it’s a fantastic way to incorporate pumpkin into your diet around the holidays.
Melt the Chocolate Mixture Using a Double Boiler
While your pumpkin butter cools, it’s time to melt your chocolate. Using a double boiler is the best way to ensure smooth, melted chocolate without fear of burning.
- Fill the bottom pot with about an inch of water and bring it to a simmer.
- Place the chocolate chips in the top pot and set it over the simmering water.
- Stir gently until the chocolate is completely melted and shiny. Be patient; you want it smooth and creamy!
Tip: If you don’t have a double boiler, creating your own with a heatproof bowl over a pot works just as well. You want to keep that chocolate silky, as it’s the coating for your chocolate pumpkin butter cups!
Assemble the Chocolate Pumpkin Butter Cups
Let’s get to the fun part – assembling your chocolate pumpkin butter cups!
- Line a muffin tin with cupcake liners for easy removal.
- Pour a tablespoon of the melted chocolate into each liner, ensuring the bottom is completely covered.
- Then, add about a tablespoon of your cooled pumpkin butter filling on top of the chocolate.
- Finally, cover the filling with another tablespoon of melted chocolate, sealing it in.
This layering provides a delightful surprise with every bite.
Chill and Set Before Enjoying
Once you’ve assembled your cups, it’s time to let them set.
- Place the muffin tin in the refrigerator for at least an hour to allow the chocolate to harden.
- After they’re firm, carefully peel away the liners.
You’ll find that the tangy pumpkin butter pairs exquisitely with the rich chocolate. You’re left with a chocolate pumpkin butter cup that not only looks fantastic but tastes even better!
Now that you’ve created your own batch of these little delights, consider pairing them with a warm beverage of your choice, like herbal tea or a silky chai latte, for an autumn-inspired treat you can savor any time. Enjoy your culinary adventure!
Variations on Chocolate Pumpkin Butter Cups
Elevate Your Chocolate Pumpkin Butter Cups with Added Spices
Want to take your chocolate pumpkin butter cups to the next level? Consider adding warm spices for that extra depth. Aromatic cinnamon, nutmeg, and ginger can transform the flavor profile, making each bite feel like a cozy hug. For a little kick, try a pinch of cayenne or black pepper. The balance of sweetness from the pumpkin combined with a hint of spice will keep your friends guessing about your secret ingredient! You might even discover a winning combo that you’ll want to craft every fall.
Explore Different Fillings for Your Chocolate Pumpkin Butter Cups
The beauty of chocolate pumpkin butter cups lies in their versatility. While pumpkin butter is delightful on its own, think outside the box with various fillings. How about a creamy peanut butter or almond butter center for a nutty twist? Or perhaps a rich caramel layer for an indulgent treat? You could also try adding dried fruits or a sprinkle of sea salt atop each cup for that fancy touch.
- Peanut Butter: A classic that never disappoints.
- Cream Cheese: For a tangy surprise.
- Caramel: Sweet and gooey goodness.
Feel free to mix and match—after all, the best part of cooking is experimenting!
If you’re curious about additional flavor infusions, sites like Bon Appétit and Epicurious offer fantastic inspiration. The next time you’re craving something sweet, these variations might just become your go-to!
Cooking Tips and Notes for Chocolate Pumpkin Butter Cups
Tips to Ensure Smooth Melting of Chocolate
Melting chocolate can be a tricky endeavor, but with a few simple techniques, you can achieve a perfectly smooth texture for your chocolate pumpkin butter cups.
- Use a Double Boiler: This gentle method prevents the chocolate from burning. Fill a pot with a couple of inches of water, bring it to a simmer, and place a heatproof bowl on top.
- Stir Frequently: Constant stirring helps the chocolate melt evenly. As it starts to melt, be patient; it can take a few minutes for it to reach that silky consistency.
- Avoid Water: Even a drop of water can seize your chocolate, leaving it grainy. Ensure your bowls and tools are completely dry.
For more tips on melting chocolate, check out Serious Eats.
How to Prevent Sticking When Removing from the Mold
Getting your chocolate pumpkin butter cups out of the mold should be a breeze. Here are some helpful hints:
- Use Silicone Molds: Silicone is flexible and non-stick, making it easier to pop out your treats. If you only have plastic molds, lightly grease them with a neutral oil before pouring in the chocolate.
- Chill, Chill, Chill: After filling your molds, let them cool in the fridge. This helps the chocolate set quickly and adhere less to the sides.
- Warm the Outside: If they’re stubborn, you can gently run warm water over the outside of the mold for a few seconds. This slight warmth can help loosen the chocolate.
With these tips, your chocolate pumpkin butter cups will be not only delicious but also a delight to make!

Serving Suggestions for Chocolate Pumpkin Butter Cups
Creative ways to present your treats
When it comes to serving your chocolate pumpkin butter cups, presentation is key. Consider using mini cupcake liners for a fun, festive touch, making them perfect for gatherings. You can arrange them on a vibrant platter adorned with autumn leaves or sprinkle some edible gold dust for an elegant look. For an extra flair, use molds or silicone baking cups in fun shapes, fitting perfectly into the fall theme.
Pairing suggestions for an elevated experience
To elevate your enjoyment of these delicious treats, think about delicious pairings. They go wonderfully with a scoop of vanilla or cinnamon ice cream, making for a cozy dessert. If you’re looking for a beverage to complement your chocolate pumpkin butter cups, serve them with a hot apple cider or a rich cup of coffee. You could even prepare a fall-inspired charcuterie board featuring dark chocolate, fresh fruits, and some cheese for a delightful contrast, making each bite an adventure.
For more serving ideas, check out resources from the Food Network and Bon Appétit for inspiration!
Time Breakdown for Chocolate Pumpkin Butter Cups
If you’re eager to dive into making chocolate pumpkin butter cups, here’s a handy time breakdown to help you organize your culinary adventure.
Preparation Time
You’ll spend about 15 minutes whipping up these tasty treats. This includes gathering your ingredients, mixing the pumpkin butter with spices, and melting the chocolate.
Refrigeration Time
Once assembled, these delightful cups need about 30 minutes in the fridge to set properly. This is crucial for achieving that perfect firmness and texture we all love in our chocolate treats.
Total Time
In total, you’re looking at roughly 45 minutes from start to finish. Just think of it as an investment in deliciousness! Perfect for a cozy night in or impressing friends at your next gathering.
By the way, if you’re curious about different flavor combinations or need ideas for pairing these chocolate pumpkin butter cups with drinks, check out this cozy beverage guide for inspiration!
Nutritional Facts for Chocolate Pumpkin Butter Cups
Calories per serving
When you’re indulging in chocolate pumpkin butter cups, it’s essential to know what you’re enjoying. Each delightful cup contains approximately 150 calories. Not too shabby for a sweet treat that combines rich flavors with a hint of seasonal spice!
Key nutrients to highlight
These little morsels don’t just satisfy your sweet tooth; they also pack a nutritional punch. Here’s what you’ll find:
- Healthy Fats: Thanks to the peanut butter, these cups feature heart-healthy fats that keep you feeling fuller for longer.
- Fiber: The pumpkin puree adds dietary fiber, which is great for digestion.
- Vitamins: Pumpkin is rich in vitamins A and C—both fabulous for skin health and immune support.
- Antioxidants: Dark chocolate brings along antioxidants that can help fight free radicals in your body.
So, whether you’re in the mood for a cozy snack or a post-workout treat, chocolate pumpkin butter cups can be a deliciously nutritious option. Would you like to learn more about the benefits of incorporating pumpkin into your diet? Check out this article on health benefits from the Mayo Clinic. Happy snacking!
FAQ about Chocolate Pumpkin Butter Cups
Getting into the kitchen and whipping up a batch of homemade chocolate pumpkin butter cups can spark a lot of questions! Let’s tackle some of the most common ones for you.
Can I use fresh pumpkin instead of canned?
Absolutely! While canned pumpkin is convenient and consistent, fresh pumpkin can offer a delightful twist. Just be sure to select a sugar pumpkin, known for its sweetness. When using fresh pumpkin, bake it until soft, then puree it until smooth. Keep in mind that fresh pumpkin may have a slightly different moisture level, so you could adjust other ingredients to maintain that perfect texture.
How long can I store these butter cups?
These chocolate pumpkin butter cups are not just a treat for the moment; they can also be stored for later enjoyment! Ideally, keep them in an airtight container in the fridge, where they’ll last about a week. For longer storage, consider freezing them. Just ensure they’re placed in a freezer-safe container, stacked neatly, and they can last for up to three months. When you’re ready to eat them, let them thaw in the fridge overnight!
Are these chocolate pumpkin butter cups suitable for kids?
Definitely! These chocolate pumpkin butter cups make for a delightful treat that kids will love, thanks to their sweet chocolate coating and creamy pumpkin filling. Plus, you’re sneaking in some nutrients from the pumpkin! As always, keep an eye on portion sizes and check for any allergies to ingredients you’re using. For more kid-friendly recipes, check out the American Heart Association’s website for a wealth of healthy options.
Now that you have the answers, it’s time to roll up your sleeves and enjoy the process of making these delicious treats!
Conclusion on Chocolate Pumpkin Butter Cups
Recap of why you should try making these delightful treats at home
Creating your own chocolate pumpkin butter cups is a rewarding experience that combines the rich flavors of chocolate with the comforting essence of pumpkin. Not only are these treats simple to whip up, but they’re also a great way to impress friends and family at gatherings—after all, who can say no to a homemade dessert?
Using basic ingredients, you can transform your kitchen into a sweet haven. Plus, making these delights allows for personalization! Want extra crunch? Add some nuts. Prefer a hint of spice? Toss in cinnamon. The options are endless. For a fun twist, check out this guide on pumpkin recipes to keep your autumn baking vibrant. So why not roll up your sleeves and create a treat that’s sure to delight?
PrintChocolate Pumpkin Butter Cups: The Best Indulgent Treat Recipe
Indulge in these creamy and decadent Chocolate Pumpkin Butter Cups that are sure to satisfy your sweet cravings. Perfect for fall!
- Prep Time: 15 minutes
- Cook Time: 10 minutes
- Total Time: 25 minutes
- Yield: 12 cups 1x
- Category: Dessert
- Method: No-Bake
- Cuisine: American
- Diet: Vegetarian
Ingredients
- 1 cup pumpkin puree
- 1/2 cup creamy peanut butter
- 1 cup chocolate chips
- 1/4 cup maple syrup
- 1 teaspoon vanilla extract
- 1/2 teaspoon cinnamon
- 1/4 teaspoon nutmeg
Instructions
- In a bowl, combine the pumpkin puree, peanut butter, maple syrup, vanilla, cinnamon, and nutmeg.
- Melt the chocolate chips in a microwave or double boiler.
- Pour a layer of melted chocolate into muffin liners and let it set.
- Add a spoonful of the pumpkin mixture into the center of each cup.
- Top with more melted chocolate and let it cool completely.
Notes
- For a sweeter treat, increase maple syrup quantity.
- These can be refrigerated to enhance flavor.
Nutrition
- Serving Size: 1 cup
- Calories: 150
- Sugar: 10g
- Sodium: 50mg
- Fat: 8g
- Saturated Fat: 3g
- Unsaturated Fat: 4g
- Trans Fat: 0g
- Carbohydrates: 18g
- Fiber: 2g
- Protein: 3g
- Cholesterol: 0mg
Keywords: Chocolate Pumpkin Butter Cups, Pumpkin Treats, Fall Desserts