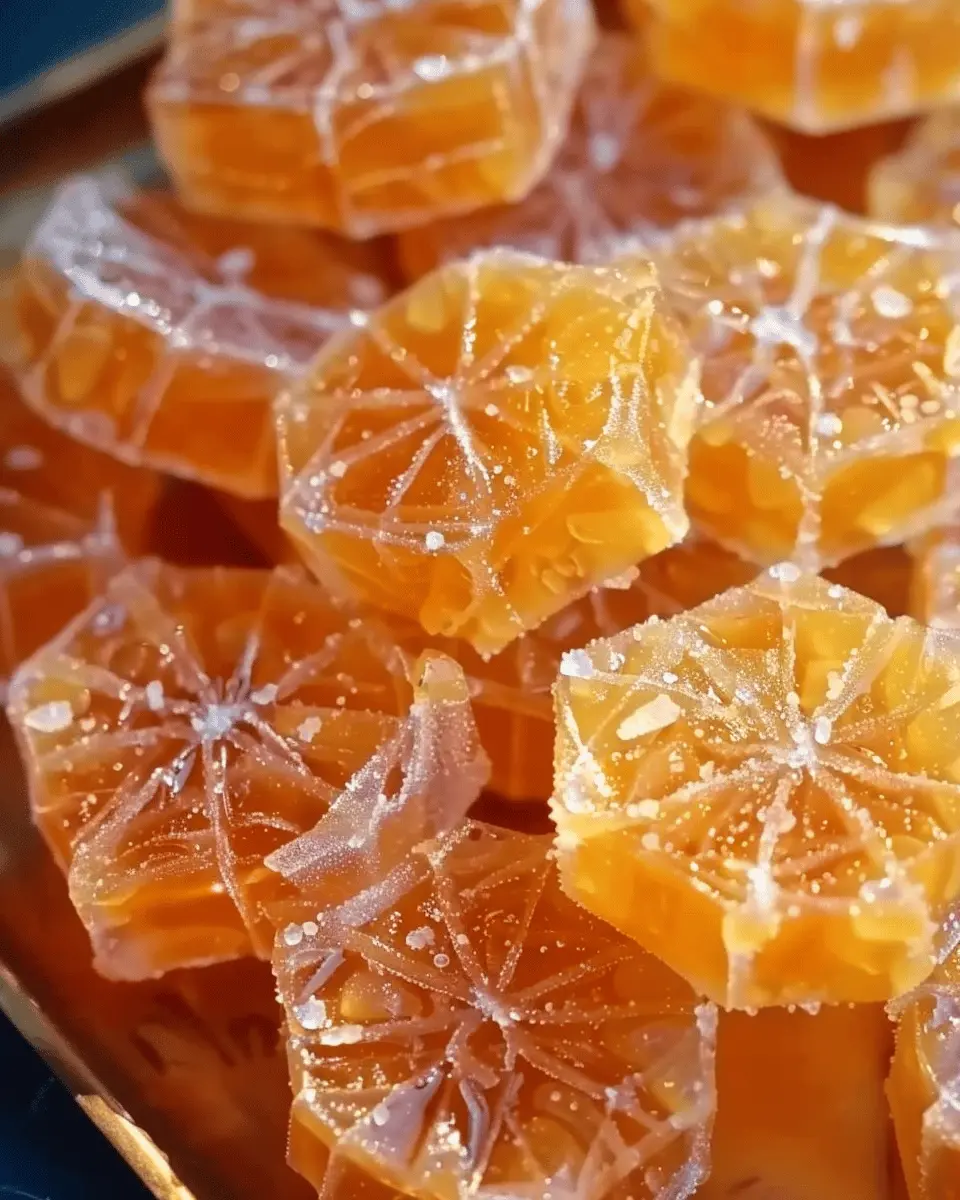
Introduction to Classic Homemade Orange Candy
Have you ever wished to indulge in a sweet treat that brings back memories of carefree childhood days? For young professionals, creating classic homemade orange candy can be more than just a fun kitchen project; it’s a delightful escape from the hustle and bustle of daily life.
Why is homemade candy such a game changer for young professionals? For starters, it’s a chance to unplug from the screens that often dominate our lives. According to a study by the Pew Research Center, nearly 40% of adults believe they are more stressed due to technology. Making candy is a hands-on activity that not only allows you to create something delicious but also serves as a mindful practice.
Involving yourself in the culinary arts can improve your mood. Cooking and crafting can release endorphins, similar to the effects of exercising or meditating. Plus, bringing homemade candy to work can be a fantastic way to connect with colleagues. Who wouldn’t appreciate a sweet gesture from a co-worker on a busy Tuesday afternoon?
When you make your own candy, you also have complete control over the ingredients, which allows you to customize flavors and avoid unwanted additives. Businesses like Food52 highlight the growing interest in homemade treats, emphasizing the joy of knowing exactly what goes into your snacks.
Crafting Your Classic Homemade Orange Candy
This recipe allows you to dive into the world of candy-making with minimal fuss. With just a few ingredients and some simple steps, you’ll soon have a batch of bright, chewy orange candies that could rival any store-bought option. And let’s be honest—there’s something incredibly satisfying about homemade treats that simply can’t be matched by commercial ones.
Not only is this a fun way to unwind after a long day, but sharing your creations can also elevate your social gatherings. Imagine setting out a charming dish of your homemade orange candy at the next gathering!
So, if you’re ready to take a break from your routine and whip up something truly delightful, join me as we dive deeper into this classic homemade orange candy recipe. Trust me; your taste buds will thank you!
Ingredients for Classic Homemade Orange Candy
Essential ingredients for a sweet treat
Creating classic homemade orange candy is simpler than you might think! To get started, you’ll need a few essential ingredients that deliver that unforgettable citrus burst. Here’s what’s on your shopping list:
- Fresh oranges: Zest of about 2 large oranges and juice from one.
- Granulated sugar: This will be the main sweetener, giving your candy its characteristic sweetness.
- Water: To create your syrup mixture.
- Corn syrup: This helps prevent the sugar from crystallizing.
- Vanilla extract: A dash of this adds depth to the flavor.
The beauty of these ingredients is that they bring out that rich, vibrant orange flavor that’s sure to impress.
Optional ingredients for creative twists
Once you have the basics down, why not add your personal touch? Here are some optional ingredients that can elevate your classic homemade orange candy:
- Food coloring: A few drops for a more vibrant appearance.
- Salt: Just a pinch can enhance the flavors beautifully.
- Other citrus zest: Incorporating lemon or lime zest for a zesty kick.
- Spices: A hint of cinnamon or ginger for warmth.
Feel free to get creative! Let your taste buds guide you, and check out Taste of Home for more ideas on flavor combinations. Happy candy-making!
Preparing Classic Homemade Orange Candy
Making classic homemade orange candy is a delightful project that promises a burst of flavor and color to your kitchen. Not only does the process bring together simple ingredients, but it also offers a nostalgic sweet treat that can be enjoyed on its own or used as a decorative accent for desserts. Let’s get started on crafting this zesty confection!
Gathering your oranges and tools
First things first: you’ll need the right oranges. Select fresh, firm oranges, preferably navel or valencias, as they provide a sweet, juicy flavor ideal for candy making. Make sure to grab:
- 4-5 medium-sized oranges
- Granulated sugar
- Water
You’ll also need some essential kitchen tools:
- A sharp knife for slicing
- A cutting board
- A saucepan
- A slotted spoon
- Parchment paper or a cooling rack for drying the candy
Having everything on hand makes the process seamless and enjoyable!
Preparing the sugar syrup
Next, it’s time to create your syrup—a crucial step in achieving that perfect sweet coating. In a saucepan, combine equal parts of granulated sugar and water. For about five orange slices, start with 2 cups of sugar and 2 cups of water.
- Combine the sugar and water in the saucepan.
- Heat over medium heat, stirring until the sugar is completely dissolved.
- Once it comes to a gentle boil, lower the heat to a simmer.
This syrup will serve as the magic glue that transforms your orange slices into those sugary bites you crave. If you’re curious, check out more on sugar syrups here.
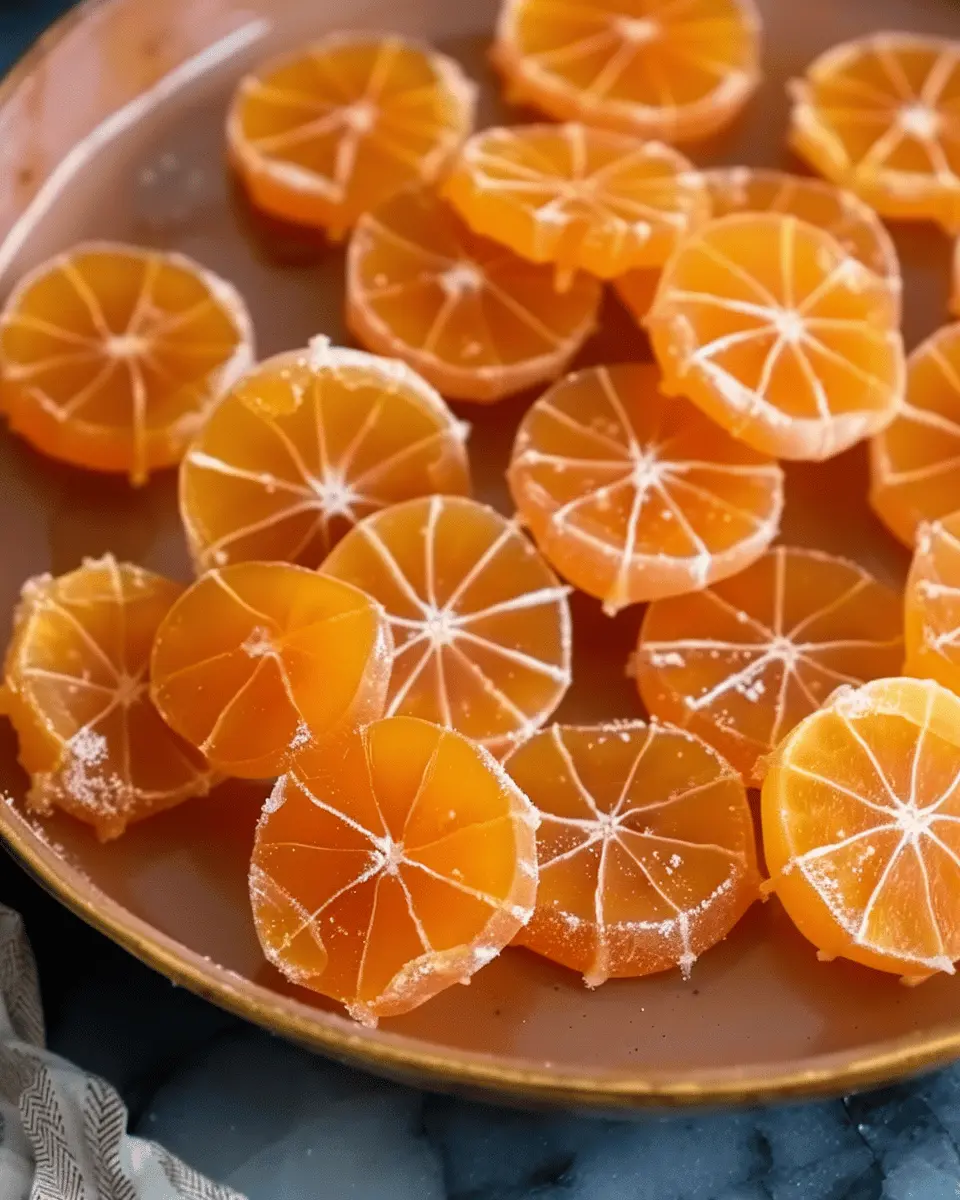
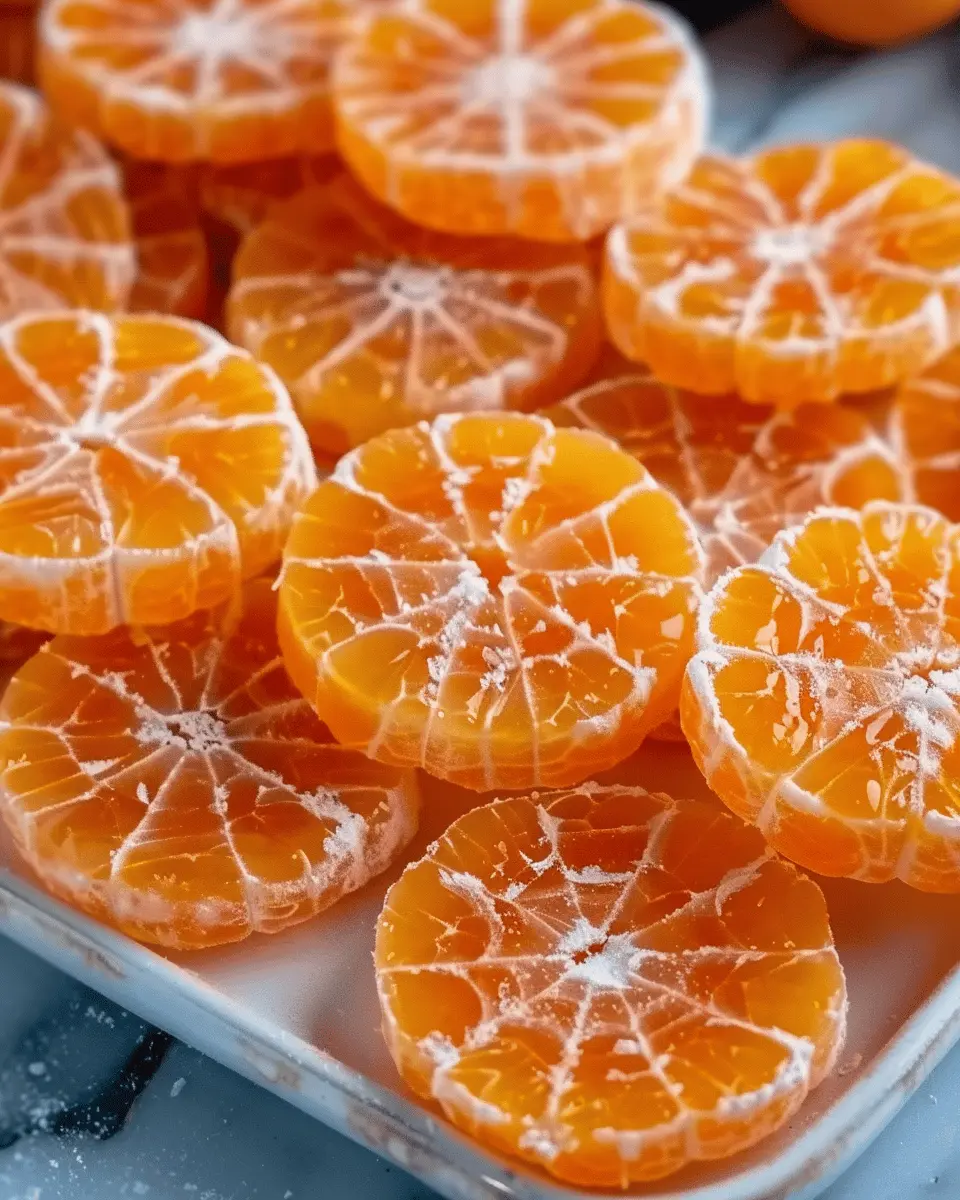
Simmering the orange slices to perfection
With your syrup ready, it’s time to introduce those lovely orange slices.
- Slice each orange into thin, even slices—about 1/4 inch thick.
- Carefully add the slices into the simmering syrup, making sure they are all submerged.
- Simmer for 45-60 minutes, or until the orange slices become translucent.
This step is where the magic happens. The oranges soak up that sugary goodness while transforming into something incredibly delicious. Plus, the aroma filling your kitchen is simply divine.
Drying the candy for that ideal texture
Once your slices have transformed, it’s time for the drying process, which is crucial for achieving that perfect candy texture.
- Using a slotted spoon, lift the orange slices out of the syrup, allowing any excess syrup to drip off before placing them on a piece of parchment paper or a cooling rack.
- Let the slices dry at room temperature for about 24 hours. You can also use an oven set to the lowest temperature (around 170°F) for about 2 hours if you’re short on time.
This drying step can make or break your candy’s final texture, so be patient! Properly dried slices will have that satisfying chewiness that complements their sugary surface.
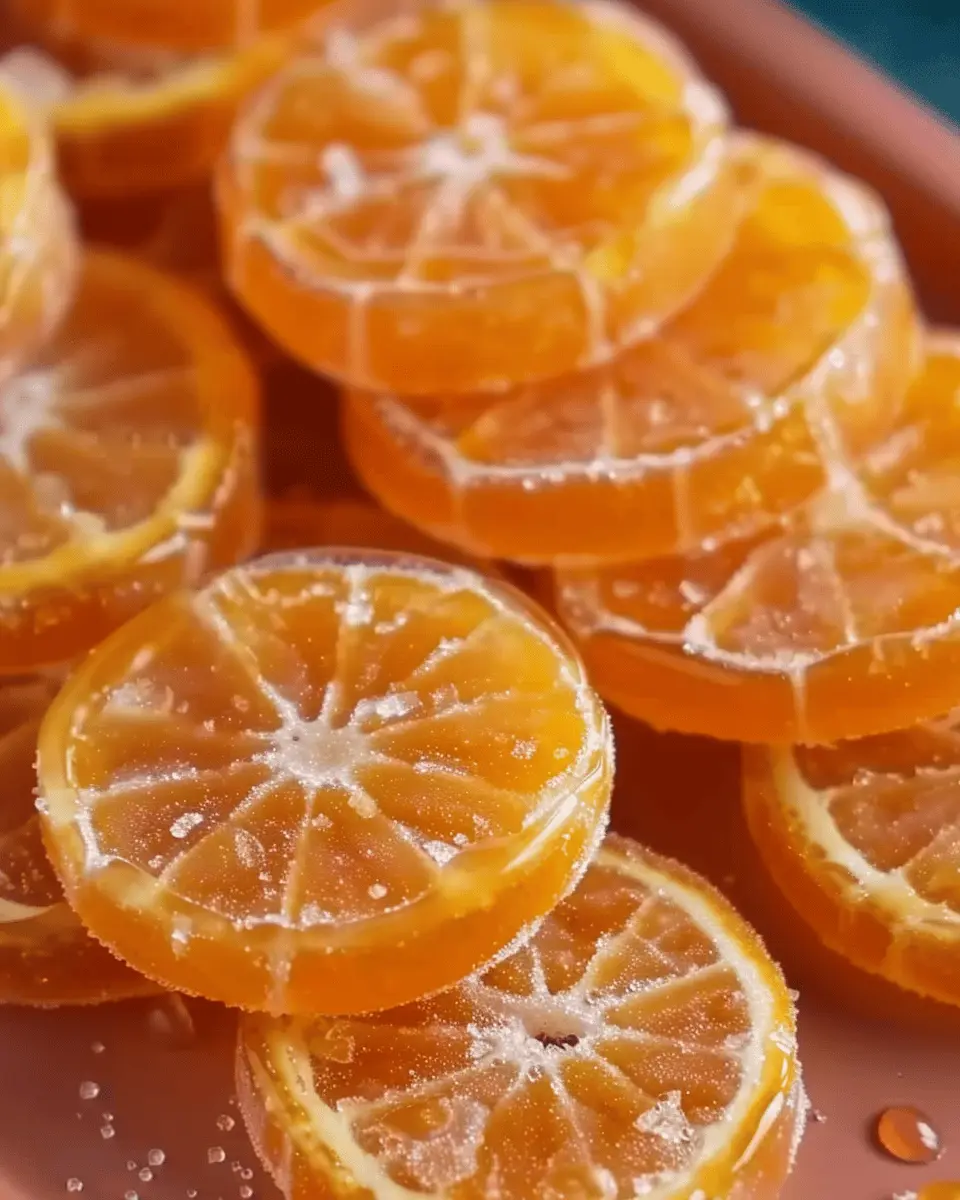
Optional finishing touches for extra flair
Want to elevate your classic homemade orange candy even more? Consider these finishing touches:
- Roll in sugar: Once dried, roll the slices in granulated sugar for an extra sweet finish.
- Dip in chocolate: Melt some dark or white chocolate and dip half of each slice for a gourmet touch.
Not only do these steps enhance flavor, but they also add a stunning visual appeal. You can explore more creative ways to finish your candies on food blogs like Smitten Kitchen.
As you prepare this delightful treat, remember to enjoy the process. There’s something incredibly rewarding about making candy from scratch, and nothing beats the satisfaction of savoring the fruits of your labor—literally!
Variations on Classic Homemade Orange Candy
If you love the zesty delight of classic homemade orange candy, you’re in for a treat! There are so many creative ways to adjust this recipe for exciting new flavors and textures. Let’s explore a couple of variations that will tantalize your taste buds.
Chocolate-Dipped Orange Slices
Imagine the perfect soft, chewy orange slices drizzled with rich chocolate! To achieve this treat, simply prepare your sliced oranges using the classic method, allowing them to cool completely. Melt some high-quality dark or milk chocolate in a double boiler or microwave. Once melted, dip half of each orange slice into the chocolate, letting the excess drip off before placing them on parchment paper to set. This sweet and slightly bitter combination elevates your classic homemade orange candy into an indulgent dessert that’s perfect for sharing—or keeping all to yourself!
For an added twist, sprinkle some sea salt or crushed nuts on top before the chocolate hardens.
Orange Candy with Added Spices for a Kick
Want to spice things up a notch? Try incorporating your favorite spices into the classic homemade orange candy recipe. A pinch of cayenne pepper or a dash of cinnamon can add a surprising kick that enhances the citrus flavor. For a more complex profile, consider using cardamom or nutmeg. Just mix these spices into the sugar when coating your dried orange slices.
This flavorful twist doesn’t just tantalize the palate; it also makes for unique gifts for friends or family who appreciate a little something different.
Experimenting with these variations allows you to enjoy your classic homemade orange candy in new and exciting ways! For more inspiration, check out Food Network or Bon Appétit for additional recipes and tips.
Cooking Tips and Notes for Classic Homemade Orange Candy
Best Practices for Slicing and Simmering
When preparing your classic homemade orange candy, start by using a well-sharpened knife to slice your oranges evenly. This will help ensure consistent cooking, allowing the sugars to caramelize perfectly. Aim for thin slices—about 1/8 inch thick—so they can fully infuse their flavor during the simmering process.
As you simmer, keep the heat low and stir occasionally to prevent sticking or burning. Patience is key! Simmering for 1 to 2 hours allows the slices to become tender and acquire that delightful candied texture you’re after. Remember to keep an eye on the process; it’s easy to lose track of time when you’re caught up in the kitchen!
Storing Your Homemade Candy for Longevity
Once your classic homemade orange candy is ready, proper storage is essential to preserve its freshness. Allow the candy to cool completely before transferring it to an airtight container. Line the container with parchment paper to prevent sticking and to absorb excess moisture, which can spoil the candy.
For extended longevity, store your candy in a cool, dark place, or you can refrigerate it for up to a month. For longer shelf life, consider freezing it; just make sure to wrap it well in freezer-safe bags. Get creative and share with friends or gift them in pretty jars—who wouldn’t love a sweet, homemade treat? For more storage tips, check out resources from The National Center for Home Food Preservation.
Serving suggestions for Classic Homemade Orange Candy
Using orange candy as a dessert garnish
One delightful way to elevate your desserts is by using classic homemade orange candy as a garnish. Picture this: a rich chocolate cake topped with a sprinkle of the finely chopped candy, adding a pop of color and a zest of flavor. Or consider adorning a scoop of vanilla ice cream with candied orange slices—it’s the perfect balance of sweetness and tartness! These candies can also enhance the presentation of a fruit salad or a yogurt parfait. The bright orange hues make your creations visually appealing, instantly catching the eye.
Creative ways to enjoy candy throughout the day
Beyond dessert, there are countless ways to enjoy your classic homemade orange candy throughout the day. Try giving your morning oatmeal a flavorful twist by mixing in chopped candy; it’s a tasty alternative to sugar. Craving a mid-afternoon snack? Pair a piece of the candy with some nuts for a satisfying, sweet-savory boost. You can even whip up a refreshing drink! Simply infuse sparkling water with a handful of orange candy for a fun, fizzy treat. Whether as a pick-me-up or a healthy dessert option, these candies can be incorporated naturally into your daily routine.
For more inspiration on elevating your culinary creations, check out EatingWell for other garnish ideas!
Time breakdown for Classic Homemade Orange Candy
Preparation time
Getting started on your classic homemade orange candy is a quick and enjoyable process that typically takes about 15-20 minutes. This includes washing and zesting the oranges, cutting them into slices, and preparing your workspace. A well-organized kitchen makes all the difference!
Cooking and drying time
The cooking phase usually takes around 45 minutes to an hour. After the initial boiling and simmering, you’ll want to let those sweet slices dry out. Depending on how chewy you like your candy, the drying process can take anywhere from 6 to 24 hours. It’s a great time to catch up on a show or read a book.
Total time commitment
In total, you can expect a time commitment of approximately 7 to 25 hours when combining both preparation, cooking, and drying times. But don’t let the total seem daunting! The hands-on time is minimal, and you’ll be rewarded with delightful homemade candy that you can share with friends or enjoy yourself. Check out appealing recipes on sites like Serious Eats for more fun candy ideas!
Nutritional facts for Classic Homemade Orange Candy
When indulging in sweet treats, it’s wise to know what you’re munching on. Here’s a brief breakdown of the nutritional aspects of classic homemade orange candy.
Calories per slice
Each slice of this delightful candy houses approximately 50 calories. It’s a small yet satisfying treat that can fit into a balanced diet.
Sugar content
The candy contains around 10 grams of sugar per slice. While it’s certainly sweet, consider enjoying it in moderation, especially if you’re mindful of your sugar intake.
Other nutritional highlights
In addition to its delightful flavor, classic homemade orange candy offers some vitamin C, thanks to the oranges used. It’s always nice to have a sweet that provides a bit of nutrition!
For more detailed insights into sugar intake and diet, check out reputable sources like the American Heart Association and Nutrition.gov. They provide valuable information on managing dietary choices while enjoying homemade treats!
FAQs about Classic Homemade Orange Candy
What type of oranges work best for candy making?
When it comes to making classic homemade orange candy, the best choices are navel oranges or Valencia oranges. These varieties are known for their vibrant flavor and sweetness, which is perfect for candy. Navel oranges are easy to peel, while Valencia oranges provide a juicy, tangy taste. Feel free to experiment with different types of oranges, but these two are a solid starting point for your candy-making journey.
Can I store orange candy in the fridge?
Yes, you can store your classic homemade orange candy in the fridge, but it’s best to keep it in an airtight container to prevent it from absorbing any odors. If you prefer a chewier texture, keep it at room temperature in a cool, dry place. A kitchen cupboard often works well here, allowing the flavors to meld perfectly without the cold dulling their brightness.
How long does homemade orange candy last?
If stored properly, your classic homemade orange candy can last up to two weeks at room temperature. If you decide to store it in the fridge, it can last even longer—up to three weeks. To extend its shelf life, consider vacuum sealing or freezing the candy. Just remember to let it come back to room temperature before enjoying it!
Have more questions? Don’t hesitate to check out reliable resources like USDA Food Safety or EatingWell for more food storage tips! Cooking can be such a delightful and enjoyable adventure, and your homemade candy is just the beginning of it.
Conclusion on Classic Homemade Orange Candy
Making your own classic homemade orange candy is not just a delightful experience; it’s an opportunity to show off your culinary skills and impress friends and family. Why buy store-bought when you can craft a personalized treat bursting with fresh orange flavor?
Don’t hesitate to dive into this flavorful adventure! Gather your ingredients, follow the simple steps, and savor the satisfaction of creating your very own candy. You might even find yourself experimenting with other flavors.
For more insight on candy-making techniques, check out resources on sites like Serious Eats or Food52. Enjoy creating and indulging in your delicious masterpiece!
PrintClassic Homemade Orange Candy: The Best Sweet Treat for All

Discover how to make delicious homemade orange candy with this easy recipe. Perfect for any occasion!
- Prep Time: 10 minutes
- Cook Time: 20 minutes
- Total Time: 30 minutes
- Yield: 20 pieces 1x
- Category: Candy
- Method: Stovetop
- Cuisine: American
- Diet: Vegetarian
Ingredients
- 2 cups orange juice
- 2 cups granulated sugar
- 1/4 cup corn syrup
- 1/2 teaspoon vanilla extract
- 1/4 teaspoon cream of tartar
Instructions
- In a saucepan, combine the orange juice, sugar, corn syrup, and cream of tartar.
- Bring to a boil over medium heat, stirring until the sugar dissolves.
- Reduce the heat and simmer until the mixture reaches the soft-ball stage (about 240°F).
- Remove from heat and stir in the vanilla extract.
- Pour the mixture into a greased pan and let it cool completely.
- Once set, cut into squares and enjoy!
Notes
- For a stronger orange flavor, add the zest of one orange to the mixture.
- Be cautious with the temperature to avoid burning the candy.
Nutrition
- Serving Size: 1 piece
- Calories: 80
- Sugar: 18g
- Sodium: 2mg
- Fat: 0g
- Saturated Fat: 0g
- Unsaturated Fat: 0g
- Trans Fat: 0g
- Carbohydrates: 20g
- Fiber: 0g
- Protein: 0g
- Cholesterol: 0mg
Keywords: orange candy, homemade candy, sweet treats