Introduction to Easy Butterfinger Balls
The irresistible allure of homemade treats
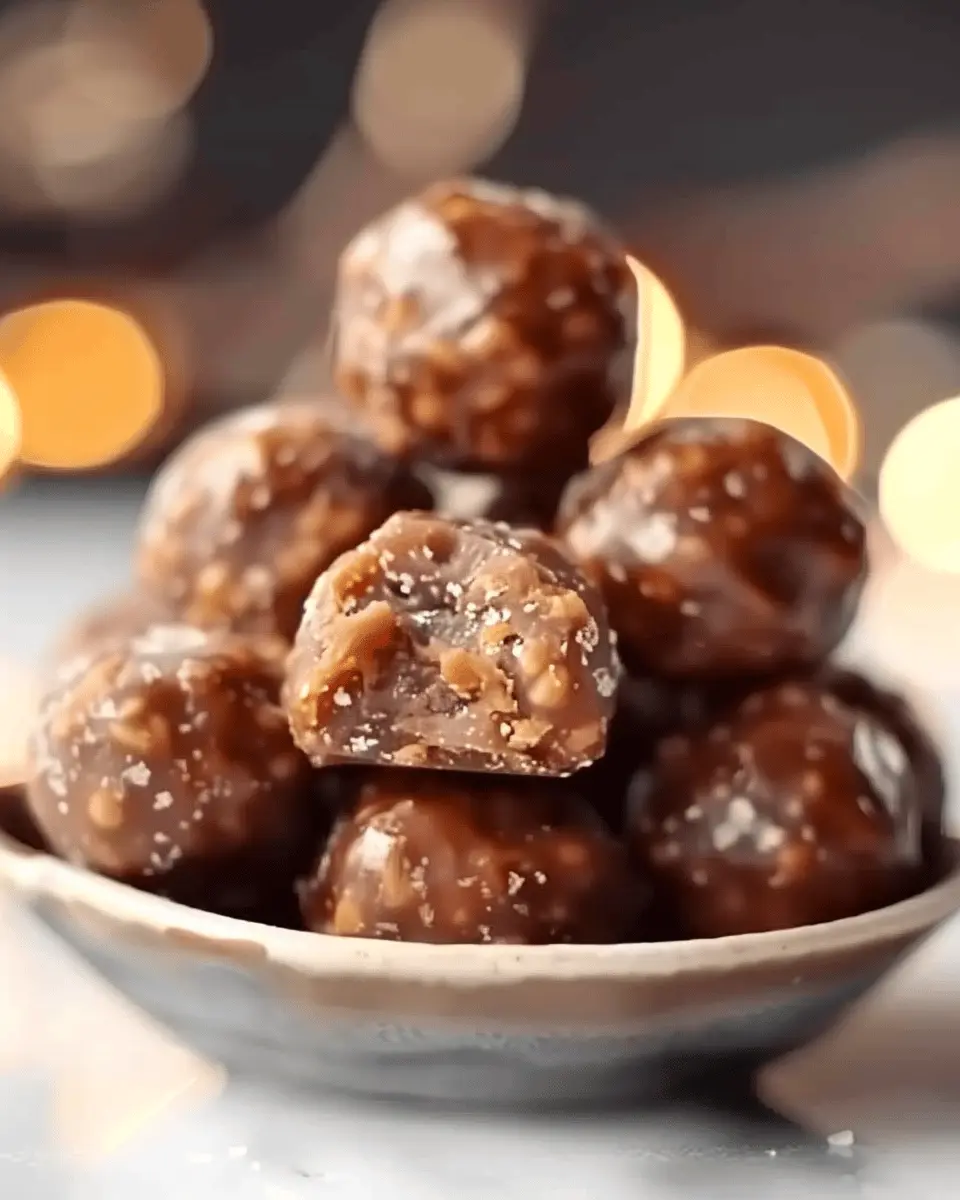
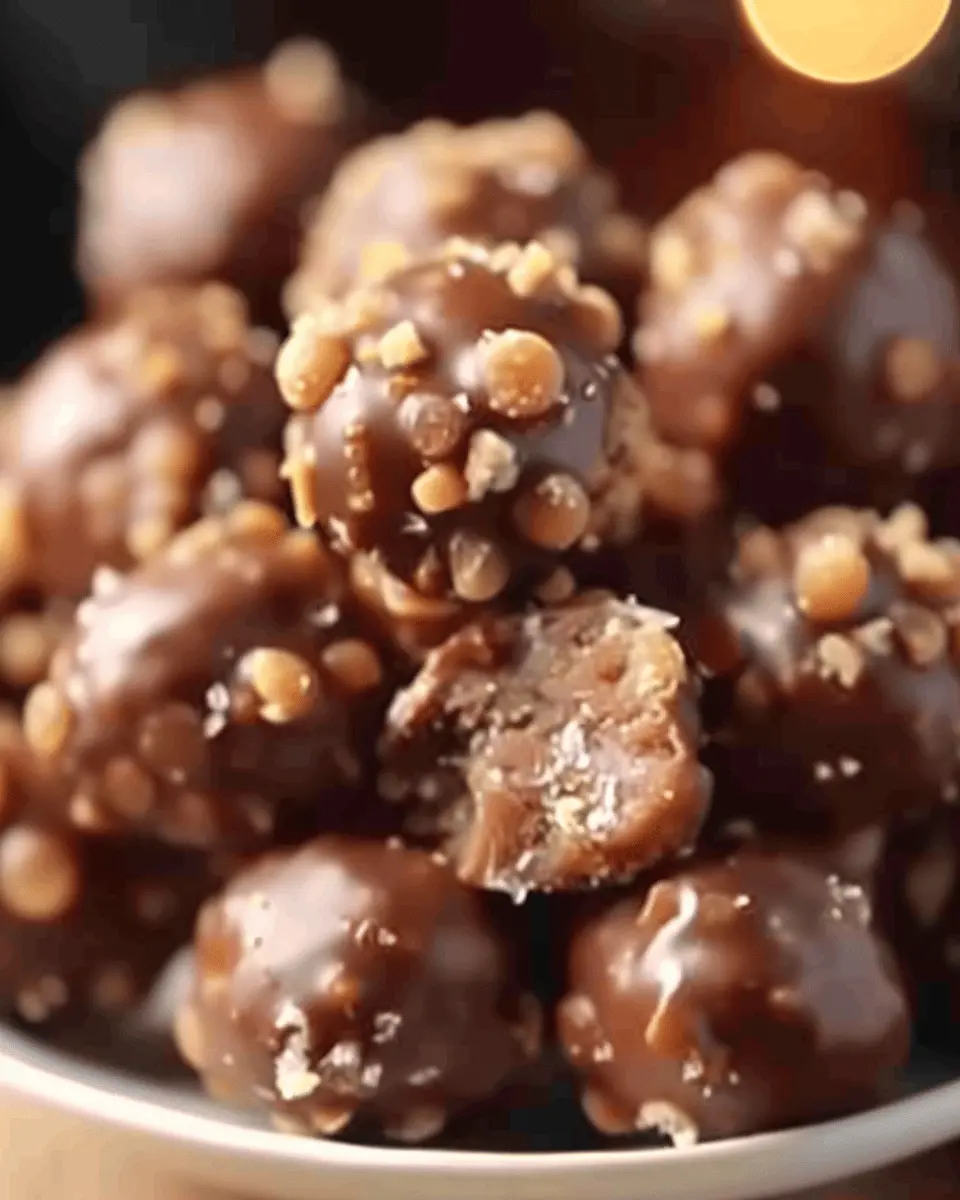
There’s something truly special about homemade treats that simply can’t be replicated by store-bought snacks. Easy Butterfinger balls epitomize this charm, combining creamy peanut butter and a delightful crunch that leaves taste buds dancing. With just a handful of ingredients and minimal effort, you can create a sweet, satisfying indulgence that feels like a secret treasure.
When you take a bite of these delectable treats, you’re not just enjoying a snack; you’re treating yourself to a little slice of joy made with love in your own kitchen. Whether you’re preparing for a gathering or just rewarding yourself after a long day, the act of creating something from scratch adds an extra layer of satisfaction. For those curious about homemade confections, this recipe can be a gateway to exploring other delightful dessert-making adventures.
For more about the benefits of homemade snacks, you might want to check out American Heart Association.
Why Butterfinger balls are the perfect solution for busy professionals
As a busy professional, juggling work, social life, and personal errands can sometimes leave little time for culinary creativity. That’s where easy Butterfinger balls shine—they’re not just quick to make; they also require minimal clean-up, all while delivering maximum flavor.
Imagine coming home after a hectic day, only to whip up a batch of these delightful treats in under 30 minutes. With just a few key ingredients—peanut butter, crushed graham crackers, and chocolate—you’ll have a guilty pleasure ready to enjoy. They store well, too, making them perfect for grabbing on the go or stashing in a desk drawer for when the afternoon slump hits.
Moreover, these treats aren’t just about convenience; they also allow you to personalize your creations. You can experiment with different toppings or fill them with your favorite chocolates. Pretty soon, you’ll find yourself always prepared for office celebrations or spontaneous movie nights.
So why not treat yourself and your colleagues? It’s a sweet break everyone can appreciate, and you’ll receive plenty of compliments for your culinary skills—without the fuss! When it comes to easy yet impressive snacks, easy Butterfinger balls truly hold a special place, ready to satisfy your cravings any time of day.
Ingredients for Easy Butterfinger Balls
Essential ingredients for the perfect taste
Creating the ultimate easy Butterfinger balls starts with a few essential ingredients that pack a punch of flavor. Here’s what you’ll need:
- Butterfinger candy bars: About 5 large bars will give you that unmistakable flavor and crunch.
- Cream cheese: Use 8 ounces, softened to room temperature. This will create a creamy base that holds everything together beautifully.
- Chocolate candy coating: You can opt for either milk or dark chocolate, depending on your preference. About 1-2 cups will do the trick.
As you gather these ingredients, consider the convenience of online grocery shopping if you’re short on time. Services like Instacart or Amazon Fresh can be lifesavers for busy professionals.
Optional toppings to elevate your Butterfinger experience
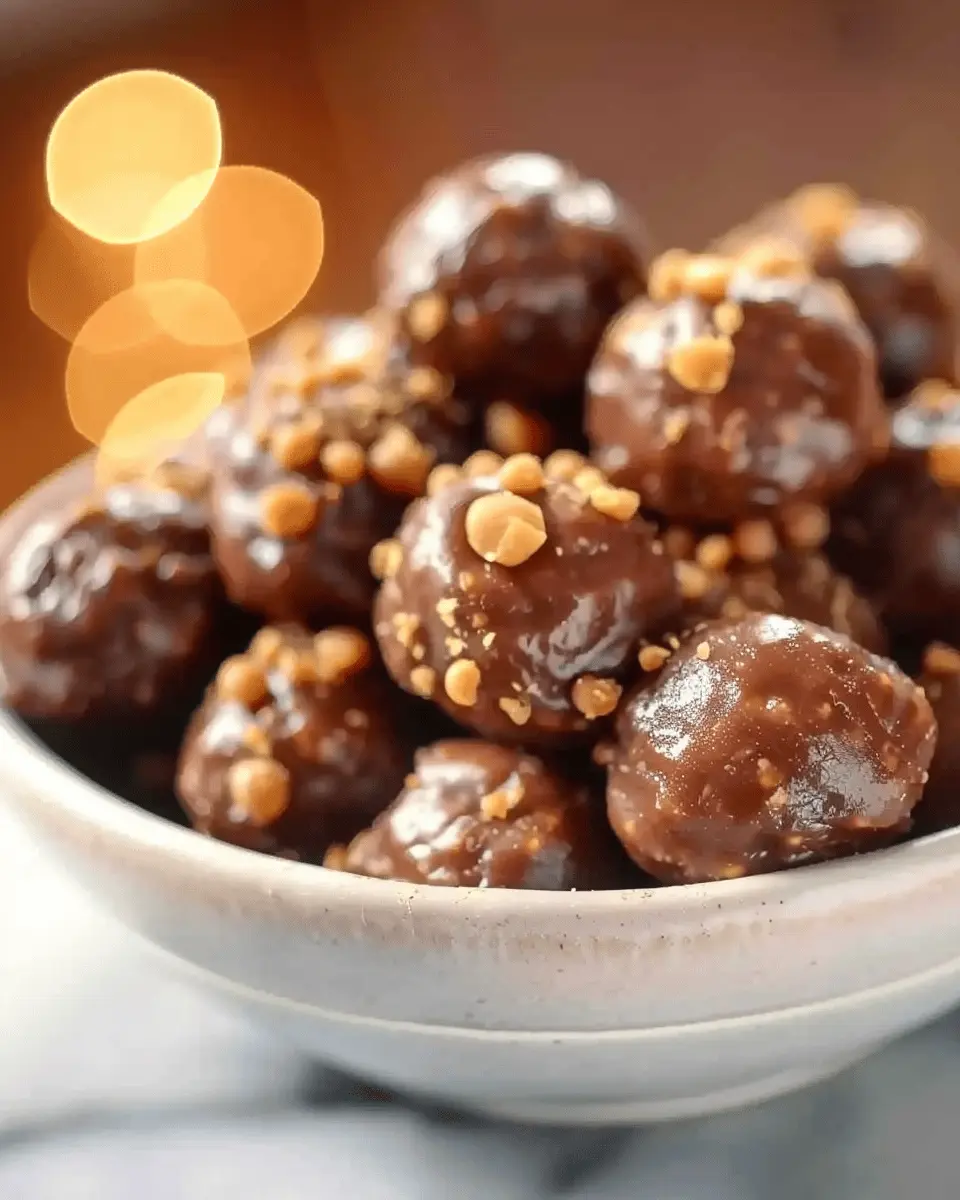
Once you’ve crafted your easy Butterfinger balls, why not dress them up a bit? Here are some fun topping ideas to elevate your treat:
- Chopped nuts: Almonds or peanuts add a delightful crunch.
- Colored sprinkles: Perfect for birthdays or special occasions.
- Drizzled chocolate: For those looking to make their treat extra special; a drizzle of white chocolate can be a gorgeous touch.
Experimenting with toppings can transform your Butterfinger experience into something truly personalized, so get creative!
Preparing Easy Butterfinger Balls
Creating delightful easy Butterfinger balls at home is not just a treat; it’s a fun, no-fuss activity that can quickly become a favorite in your kitchen. With a few simple ingredients and steps, you can make these sweet, crunchy morsels that will have everyone coming back for more. Let’s dive into the preparation process!
Gather Your Ingredients
Before you start whipping up these tasty bites, it’s important to gather all your ingredients. Here’s what you’ll need:
- 1 cup of finely crushed Butterfinger candy bars
- 1 cup of creamy peanut butter
- 1/4 cup of unsalted butter, softened
- 1-2 cups of powdered sugar (to taste)
- 2 cups of chocolate chips (for coating)
Make sure you have everything on hand, as this makes the process smoother and quicker. You can find Butterfinger bars at most grocery stores or purchase them online if you’re in a pinch.
Mix the Butter and Peanut Butter
In a large mixing bowl, combine softened unsalted butter and creamy peanut butter. Using a mixer or a spatula, blend them together until you achieve a smooth, creamy consistency. This step is crucial because it sets the foundation for the rich flavor of your easy Butterfinger balls.
Do you enjoy that creamy peanut butter goodness? Make sure to taste as you go—after all, who can resist a little sampling? According to experts, the combination of peanut butter and butter not only enhances flavor but also affects the texture, making it easier to form into balls later on.
Incorporate the Dry Ingredients
Now that your butters are blended, it’s time to add in the dry ingredients. Gradually mix in the powdered sugar and the crushed Butterfinger candy bars. Start with one cup of powdered sugar, then adjust according to your desired sweetness. This mixing stage should be done gently; too much stirring can make the mixture tough.
This is where the magic happens—the incorporation of crushed Butterfinger adds that signature crunch and flavor. It’s fascinating to think that a candy you loved as a child can be turned into a star ingredient in homemade treats!
Shape the Mixture into Balls
Once everything is mixed well, it’s time to create the balls. Use your hands to scoop out about a tablespoon of the mixture and roll it into a ball shape. Place each ball on a baking sheet lined with parchment paper. This is a great moment to get creative—try varying the size of your balls for some fun presentation. And don’t forget: a little mess is part of the fun in cooking!
Chill for Optimal Texture
Refrigerate the baking sheet with your formed balls for about 30-60 minutes. Chilling helps them set and makes the chocolate coating process much easier later on. Plus, it strengthens the flavors, allowing each easy Butterfinger ball to become even more delicious!
Melt the Chocolate for Coating
While your balls chill, you can start melting the chocolate. Use a double boiler or microwave to melt your chocolate chips until smooth and creamy. If you prefer a thinner chocolate coating, consider adding a small amount of vegetable oil to reach the desired consistency. Just a friendly tip: always keep an eye on your chocolate; it can go from melted to burnt in just seconds!
Dip and Decorate the Balls
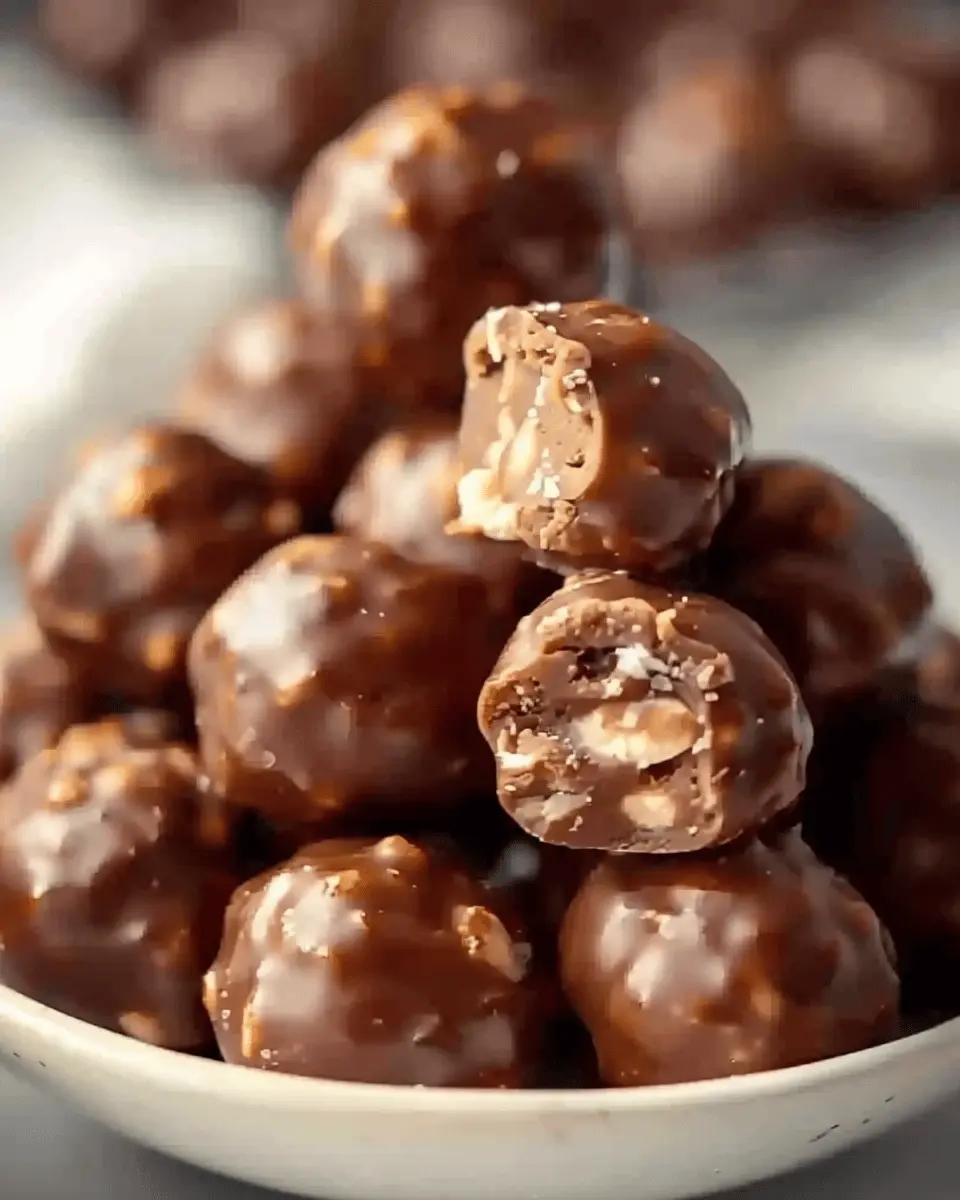
Now comes the fun part—dipping your chilled balls into that luscious melted chocolate! Use a fork or toothpick to dip each ball, allowing the excess chocolate to drip off before placing them back on the parchment-lined sheet. If you’re feeling extra festive, sprinkle some crushed Butterfinger on top before the chocolate sets for a beautiful and flavorful garnish.
Once you’ve dipped and decorated all your easy Butterfinger balls, allow them to set completely. You can either let them cool at room temperature or pop them back in the fridge for a faster method.
Enjoy making these delightful bites that are perfect for sharing at gatherings, parties, or simply treating yourself—it’s hard to stop at just one! And remember, the best part about them is that they can be customized to your taste; you can explore different chocolate types or even add sprinkles for an extra pop. Happy munching!
Variations on Easy Butterfinger Balls
Peanut Butter Crunch Alternative
If you’re looking to switch things up a bit, try replacing the traditional peanut butter in your easy Butterfinger balls with a peanut butter crunch spread. This swap adds an exciting textural twist that elevates your treats to a whole new level. Simply use the same amount of peanut butter crunch as you would regular peanut butter — the resulting flavor is undeniably yummy, with that satisfying crunch that contrasts so well with the smooth chocolate coating. You might also consider adding some crushed crispy rice cereal for even more crunch if you’re feeling adventurous!
Dairy-Free Chocolate Option
For those who are lactose intolerant or prefer a dairy-free lifestyle, creating a dairy-free version of easy Butterfinger balls is a breeze. Opt for a high-quality dairy-free chocolate, which is readily available at most grocery stores. Brands like Enjoy Life or Hu Chocolate offer tasty alternatives that ensure you won’t miss out on that rich chocolate flavor. Melt the dairy-free chocolate the same way you would regular chocolate, making sure to keep an eye on the temperature to prevent burning. These small adjustments allow everyone to enjoy your delicious treats without compromise.
With these simple variations, your easy Butterfinger balls can cater to a wider range of dietary preferences. So, which version will you try first? Share your thoughts in the comments below and connect with others experimenting with their own flavor variations! If you want more inspiration, check out this article on alternative dessert ideas here. You might discover even more delicious twists!
Cooking Notes for Easy Butterfinger Balls
Tips for Achieving the Best Texture
When making your easy Butterfinger balls, achieving the perfect texture is key to delighting your taste buds. Here are some tips to keep in mind:
- Crush the Candy Bars Well: The finer the crumbs from your Butterfinger bars, the smoother your dough will be. A food processor can work wonders!
- Balance the Peanut Butter: Using creamy peanut butter instead of crunchy will give your balls a smoother consistency. However, a bit of crunch can add interesting texture!
- Chill Before Dipping: After shaping your balls, let them chill in the fridge for at least 30 minutes. This helps them hold their shape when you dip them in chocolate.
Storage Suggestions for Freshness
To keep your easy Butterfinger balls fresh and delicious, consider the following storage tips:
- Refrigerate: Store your treats in an airtight container in the fridge, where they can last for up to two weeks.
- Freeze for Longer Life: If you want to enjoy them later, freeze the balls in a single layer and then transfer them to a container. Thaw in the fridge before serving for best results.
You can find additional storage advice on food preservation from the USDA or other trusted sources!
Serving suggestions for Easy Butterfinger Balls
When it comes to serving easy Butterfinger balls, you want to elevate this delightful treat beyond just a simple dessert.
Perfect pairings for this sweet treat
Consider serving your easy Butterfinger balls alongside fresh fruit like strawberries or sliced apples. The tartness of the fruit perfectly balances the sweetness of the chocolate and peanut butter. Additionally, offering a scoop of vanilla ice cream can create a delectable dessert combo that will leave your guests raving. Intend to make it a little more festive? Serve with a hot cup of cocoa or a rich caramel latte for a cozy touch.
Creative presentation ideas for gatherings
Imagine presenting your easy Butterfinger balls in a beautiful pastry box or on a decorative platter. You might also consider arranging them on a tiered stand that allows their gorgeous, chocolate-covered finish to shine. If you’re feeling especially crafty, you could even add little labels or tags that describe each treat—perhaps one for “Chocolate Bliss” or “Peanut Butter Heaven.”
For more inspiration on serving ideas, check out this great resource for creative entertaining tips.
Time breakdown for Easy Butterfinger Balls
Preparation time
Making easy Butterfinger balls is a breeze! You’ll need about 15 minutes to gather your ingredients and form those delectable little treats. Grab a mixing bowl and start crushing those candies while softening the cream cheese. Trust me, the minute you taste these, you’ll be glad you spent those few moments prepping!
Chilling time
Once formed, let your easy Butterfinger balls chill in the refrigerator for about 30 minutes. This is crucial as it allows them to firm up and makes them extra delightful to eat. You could even prep them ahead of time and let them chill longer!
Total time
In just under an hour (around 45 minutes), you’ll have a platter filled with your delicious easy Butterfinger balls. Perfect for parties, potlucks, or just to have on hand for a late-night sweet snack. These little delights are sure to win hearts and taste buds alike!
For more tips and tricks on creating magical desserts, consider checking out Baker’s Royale or Sally’s Baking Addiction. Happy cooking!
Nutritional facts for Easy Butterfinger Balls
Overview of calories and macronutrients
When it comes to easy Butterfinger balls, understanding the nutritional facts is essential for enjoying them guilt-free. Each ball typically contains around 110 calories, with the majority derived from carbohydrates and fats. Here’s a quick breakdown:
- Calories: 110
- Carbohydrates: 14g
- Fat: 5g
- Protein: 2g
These bites of joy combine delicious ingredients to create a perfect blend of flavor and satisfaction.
Healthier options without compromising flavor
Want to enjoy easy Butterfinger balls while keeping things a bit lighter? Consider these healthier alternatives:
- Nut Butters: Swap traditional peanut butter for a natural almond or sunflower seed butter to lower sugar content.
- Dark Chocolate Coating: Use dark chocolate instead of milk chocolate to boost antioxidants.
- Sweeteners: Opt for honey or maple syrup as a natural sweetener instead of powdered sugar.
With these simple changes, you can savor every bite while being mindful of your health. For more tips on healthy ingredient swaps, check out resources from Healthline or ChooseMyPlate.gov. Enjoy your treats without sacrifice!
FAQs about Easy Butterfinger Balls
How can I make my butterfinger balls less sweet?
If you find that easy Butterfinger balls are a tad too sweet for your taste, there are a few tricks you can try. For starters, consider reducing the amount of powdered sugar in your recipe. You could also balance out the sweetness by adding a pinch of salt or a splash of vanilla extract. These additions can enhance flavor complexity and make the overall treat more enjoyable.
Can I substitute any ingredients?
Absolutely! One of the best things about making easy Butterfinger balls is their flexibility. If you’re looking to swap out ingredients, here are some suggestions:
- Peanut Butter: Any nut butter (like almond or cashew) can work well if you have a nut allergy.
- Chocolate: Instead of using regular milk chocolate, try dark chocolate for a richer taste or sugar-free chocolate if you’re cutting down on sugar.
- Butter: Coconut oil is a great vegan alternative if you need it.
Don’t hesitate to get creative—cooking is all about experimentation!
How do I store leftover butterfinger balls?
To keep your easy Butterfinger balls fresh, store them in an airtight container in the refrigerator. They should stay good for about a week. If you need to keep them longer, consider freezing them. Simply layer them between parchment paper in a freezer-safe container, and they should last up to three months! Just remember to let them thaw in the fridge before you indulge.
For more storage tips and tricks, check out this helpful article on food storage techniques.
Let’s make snacking delicious and hassle-free!
Conclusion on Easy Butterfinger Balls
Your Turn to Create Delicious Treats
I encourage you to try your hand at making these easy Butterfinger balls! They’re a fantastic way to treat yourself or impress friends at gatherings. With just a few simple ingredients, you can create a sweet snack that sparks joy with every bite. Plus, who can resist that crunchy peanut butter flavor?
Embracing Homemade Food Choices
In a world filled with store-bought options, there’s something special about embracing homemade food choices. Crafting your own treats allows you to control the ingredients and unleash your creativity. This not only adds fun to your cooking routine but also ensures that what you enjoy is made with love. So why not dive in and enjoy the delightful process of making your own easy Butterfinger balls? You’ll be glad you did!
For more tips on homemade sweets, be sure to check out resources from food experts on AllRecipes or Food Network.
PrintEasy Butterfinger Balls: Indulgent Treats You Can Make at Home
These Easy Butterfinger Balls are a simple and delicious treat that you can prepare right in your own kitchen.
- Prep Time: 20 minutes
- Cook Time: 0 minutes
- Total Time: 30 minutes
- Yield: 20 balls 1x
- Category: Desserts
- Method: No-Bake
- Cuisine: American
- Diet: Vegetarian
Ingredients
- 1 cup crushed Butterfinger candy
- 1 cup peanut butter
- 2 cups powdered sugar
- 2 cups chocolate chips
- 1 tablespoon coconut oil
Instructions
- In a mixing bowl, combine crushed Butterfinger, peanut butter, and powdered sugar.
- Form the mixture into small balls and place them on a baking sheet lined with parchment paper.
- Melt chocolate chips with coconut oil in a microwave-safe bowl.
- Dip each ball into the melted chocolate, ensuring they are fully coated.
- Place the chocolate-coated balls back on the baking sheet and refrigerate until the chocolate hardens.
Notes
- For an extra crunch, you can add chopped nuts to the mixture.
- Keep the balls in an airtight container in the refrigerator for up to a week.
Nutrition
- Serving Size: 1 ball
- Calories: 120
- Sugar: 10g
- Sodium: 50mg
- Fat: 7g
- Saturated Fat: 3g
- Unsaturated Fat: 4g
- Trans Fat: 0g
- Carbohydrates: 15g
- Fiber: 0g
- Protein: 2g
- Cholesterol: 0mg
Keywords: Easy Butterfinger Balls, Butterfinger recipe, easy desserts