Introduction to Burnt Basque Cheesecake
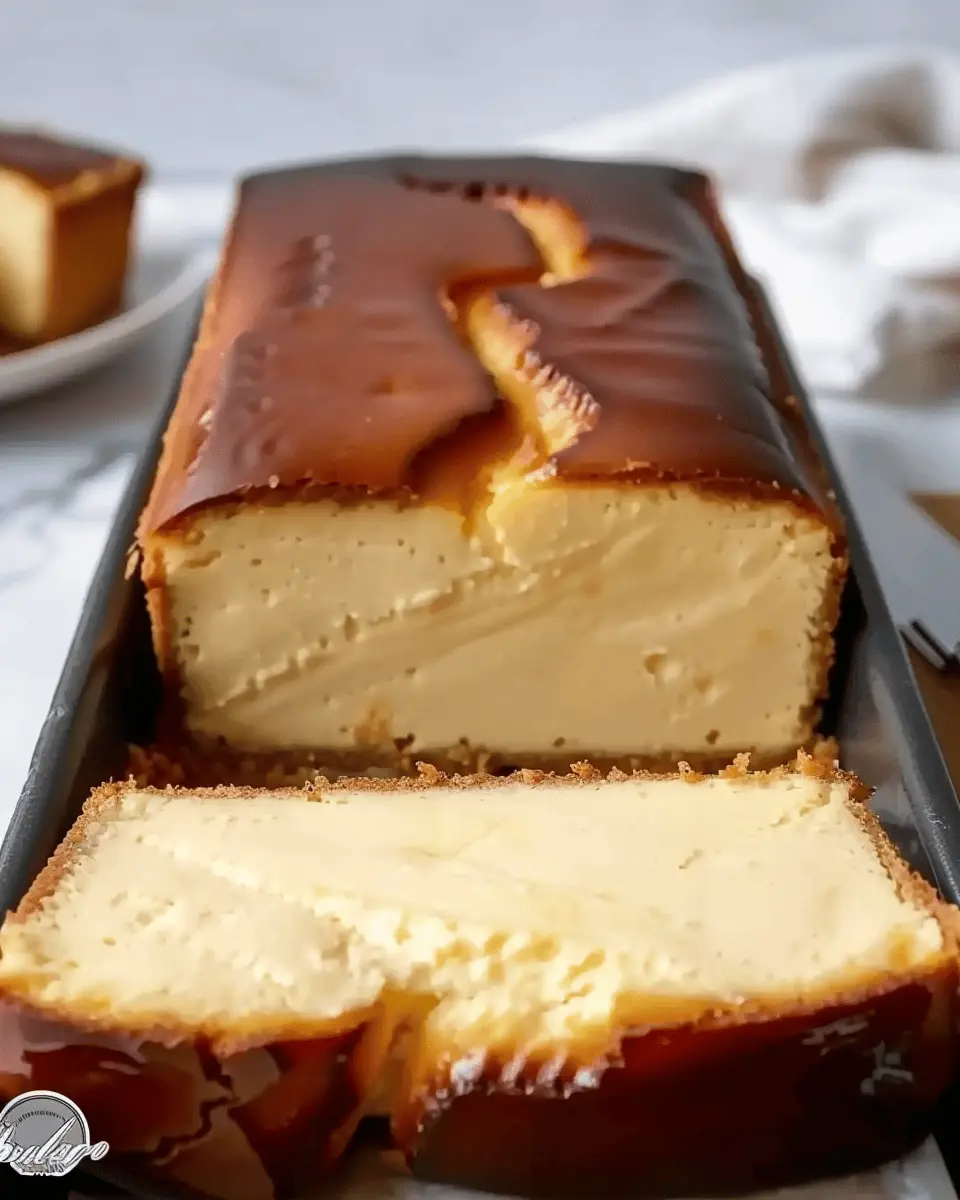
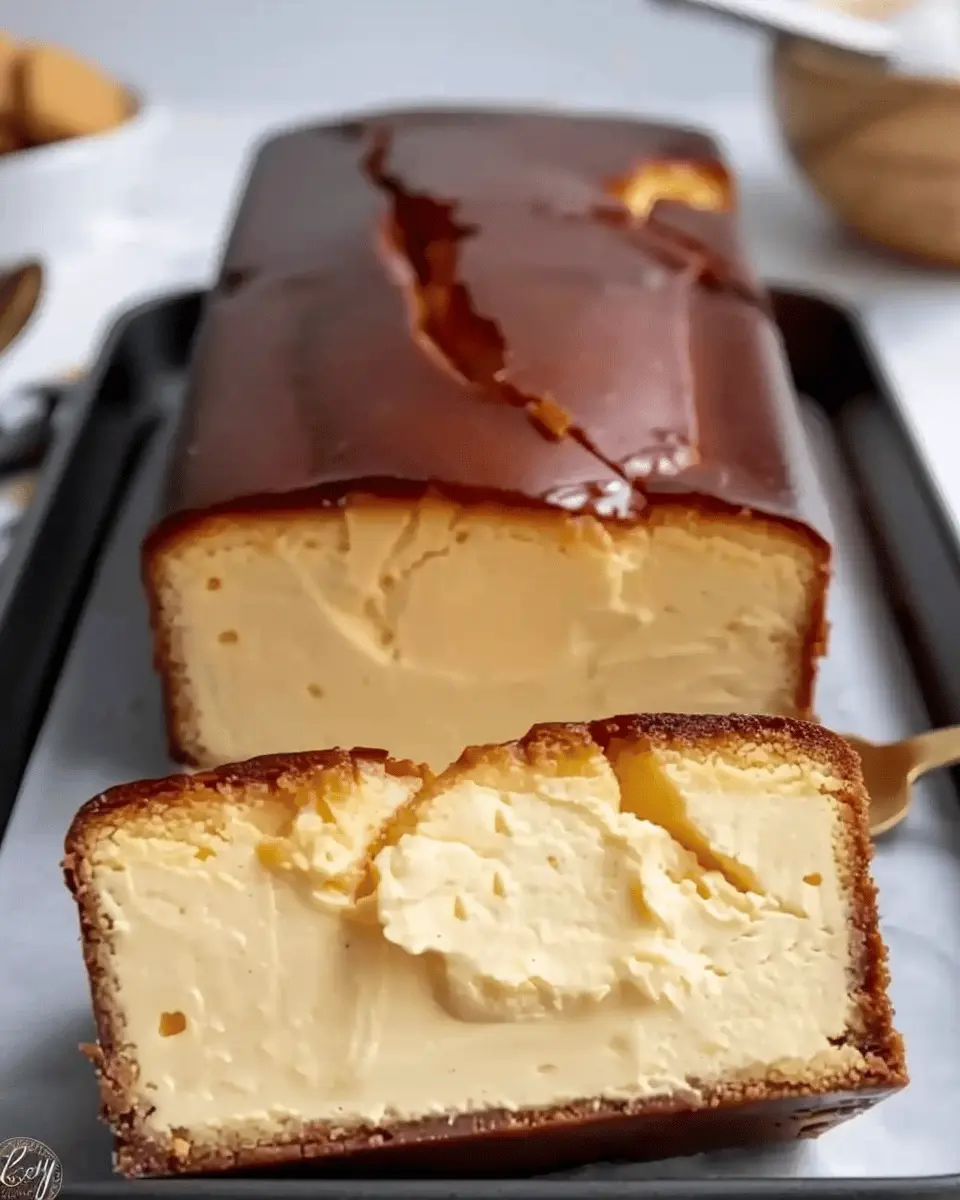
Are you ready to elevate your dessert game? If you haven’t tried the burnt Basque cheesecake, you’re in for a delightful surprise! Originating from the Basque region of Spain, this decadent treat has captured the hearts of dessert enthusiasts worldwide. With its creamy texture and slightly burnt top, it’s a cake that’s meant to be imperfectly perfect.
Why you’ll love the Burnt Basque Cheesecake
-
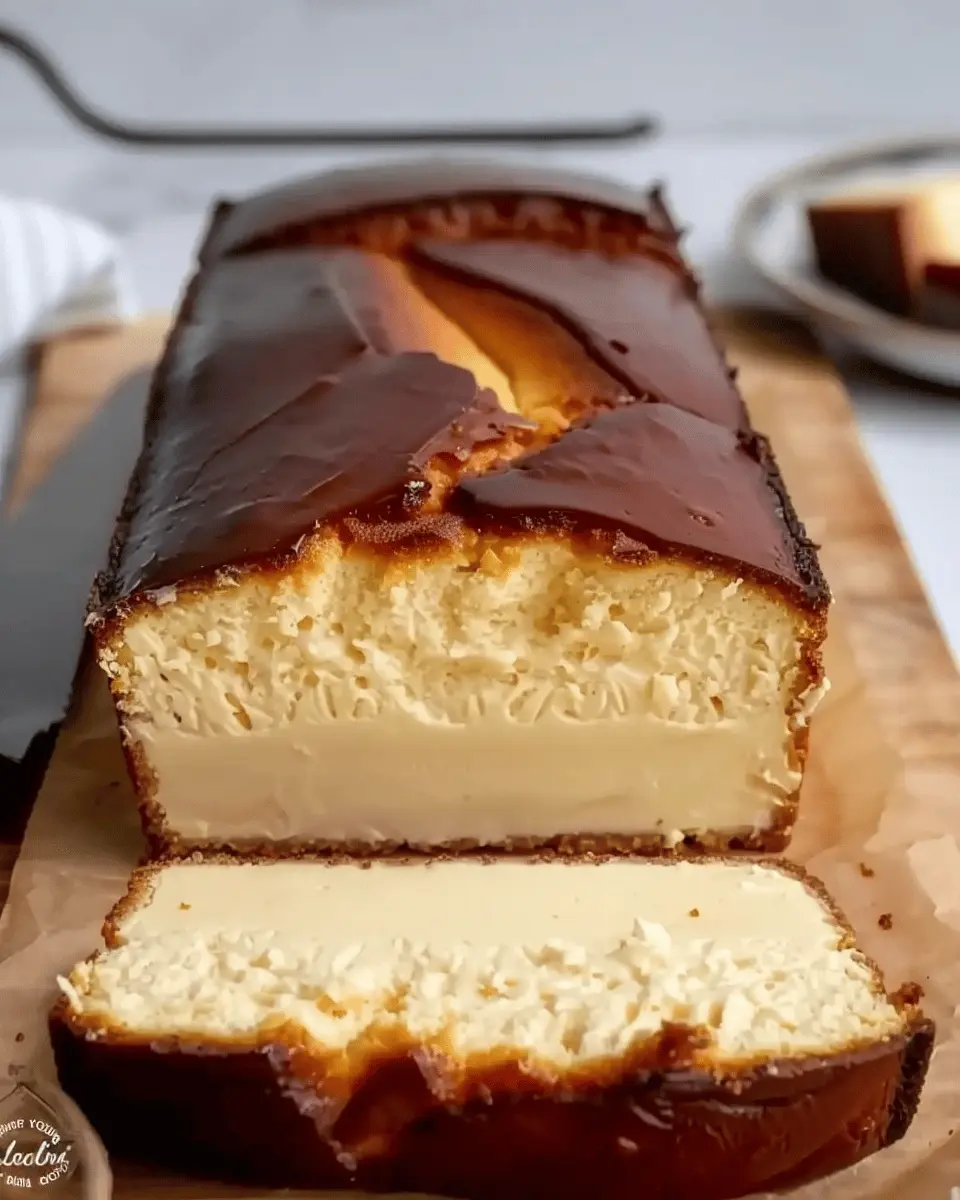
Unique Flavor Profile: This cheesecake offers a rich cream cheese flavor complemented by a subtle caramelization from the burnt top. The contrast between the creamy interior and slightly charred crust creates an indulgent experience that’s hard to resist.
-
Accessible Ingredients: You likely already have many of the ingredients lurking in your kitchen. With just a few staples—cream cheese, eggs, sugar, and a pinch of salt—you can whip up this luscious dessert. For detailed recipes, check out sources like Serious Eats or New York Times Cooking.
-
Ease of Preparation: Unlike traditional cheesecakes that require a water bath and delicate handling, the burnt Basque cheesecake is surprisingly easy to make. Just blend the ingredients, pour them into a loaf pan, and let the oven do the magic. It’s perfect for novice bakers and seasoned pros alike. You can achieve a stunning dessert without the stress!
-
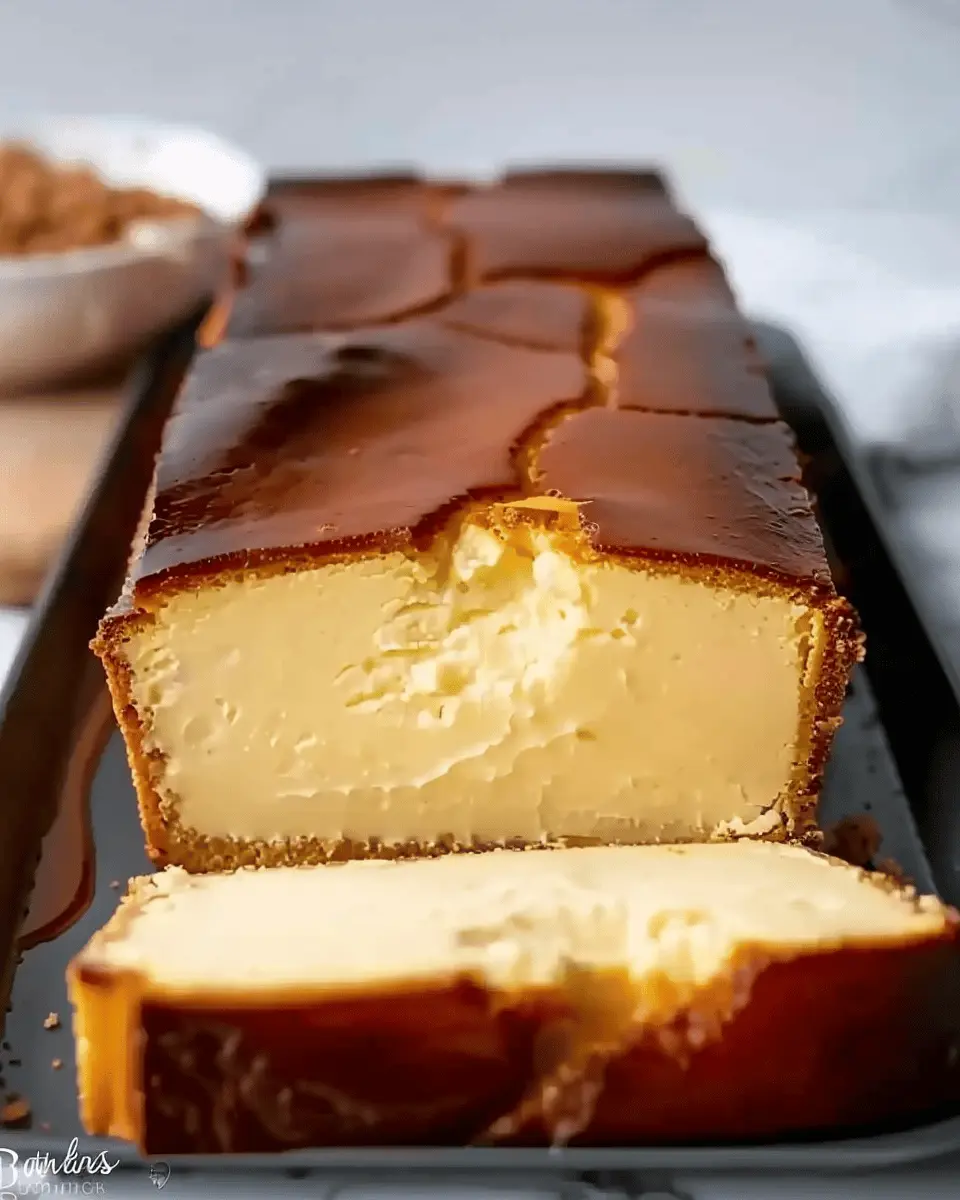
Instagram-Worthy Presentation: Let’s be honest, everyone loves a picture-perfect dessert. The burnt Basque cheesecake’s rustic look—with its caramelized top and custardy center—makes it an ideal candidate for your next social media post. It’s neither fussy nor overly decorated, yet it exudes charm and sophistication.
-
Versatile Serving Options: Whether served plain or topped with a fresh berry compote, this cheesecake pairs beautifully with various accompaniments. Consider a sprinkle of sea salt or a drizzle of honey to enhance the flavors even further.
In a world full of elaborate desserts, the burnt Basque cheesecake stands out as a simple yet stunning choice. Now that you’re intrigued by its unique characteristics, let’s dive into how to make this delightful dessert in a loaf pan—perfect for sharing or enjoying all by yourself!
Ingredients for Burnt Basque Cheesecake
Essential ingredients for a rich cheesecake
Creating the perfect burnt Basque cheesecake requires a few key ingredients that work harmoniously together to achieve that creamy, custard-like texture and caramelized flavor. Here’s what you’ll need:
- Cream Cheese: Opt for full-fat cream cheese for a rich and smooth consistency.
- Sour Cream: This adds tanginess and creaminess to balance the sweetness.
- Sugar: Granulated sugar will caramelize nicely, enhancing the burnt flavor.
- Eggs: Large eggs are essential for binding and providing structure.
- Vanilla Extract: A splash of quality vanilla enhances the overall flavor profile.
- Salt: Just a pinch elevates the sweetness and rounds out the flavors.
Common substitutes for a tailored taste
Not everyone has every ingredient on hand, and that’s perfectly okay! Here are some common substitutes that can still yield a delightful burnt Basque cheesecake:
- Cream Cheese: Greek yogurt can be used in a pinch for lower fat content, although it may alter the flavor slightly.
- Sour Cream: If you don’t have sour cream, you can use plain yogurt or a homemade version by mixing milk and vinegar.
- Sugar: Brown sugar can replace granulated sugar for a deeper sweetness.
- Eggs: For an egg-free option, try using a flaxseed meal or chia seeds mixed with water as a binder.
By adjusting these ingredients, you can create a burnt Basque cheesecake that’s uniquely yours!
Step-by-step preparation of Burnt Basque Cheesecake
Preparing a burnt basque cheesecake in a loaf pan is a rewarding experience that results in a creamy, rich dessert with a beautifully caramelized top. Follow along as we break down the steps!
Gather and prepare the ingredients
Before diving into the mixing and baking, it’s crucial to gather all your ingredients to ensure a smooth preparation process. Here’s what you’ll need:
- 16 oz (450 g) cream cheese, softened
- 1 cup (200 g) granulated sugar
- 3 large eggs
- 1 cup (240 ml) heavy whipping cream
- ¼ cup (30 g) all-purpose flour
- A pinch of salt
- Optional: parchment paper for lining the pan
Don’t forget to preheat your oven to 400°F (200°C) while you’re assembling your ingredients. This step is key for getting that dreamy burnt exterior while keeping the inside gloriously creamy.
Mix cream cheese and sugar for the base
In a large mixing bowl, combine the softened cream cheese and granulated sugar. This is where the magic begins! Using a hand mixer or a stand mixer, beat the two together on medium speed until the mixture is completely smooth and creamy. You’ll want to scrape down the sides of the bowl occasionally to make sure everything is well incorporated.
The texture should be similar to your favorite ice cream—silky and luscious. This step is incredibly important as it sets the foundation for the entire burnt basque cheesecake.
Incorporate the eggs and cream smoothly
Next, it’s time to bring in the eggs! Add them one at a time, mixing gently but thoroughly after each addition. This helps to maintain the airiness of the batter.
After the eggs are fully incorporated, pour in the heavy whipping cream and blend until you achieve a smooth, homogenous mixture. The cream will not only enrich the flavor but also contribute to that iconic cheesecake texture that makes your heart sing every time you take a bite.
Add the flour and mix gently
To finish the batter, sprinkle in the all-purpose flour along with a pinch of salt. Gently fold the flour into the mixture using a spatula or a wooden spoon. Be careful not to overmix—it should still be light and airy. This step is where a little patience pays off; a gentle touch will yield a creamy cheesecake rather than a dense one.
Bake to perfection
Now that your batter is ready, it’s time to transfer it to your prepared loaf pan. If you’re using parchment paper, make sure it’s lined well to help with easy removal later. Pour in the batter, and smooth out the top with a spatula.
Pop your loaf pan in the preheated oven and bake for approximately 40-50 minutes. The top should turn a deep golden brown, and you may notice a few cracks forming. This is perfectly normal! Remember, the beauty of a burnt basque cheesecake lies in its slightly charred surface.
Cool and chill the cheesecake
Once baked, remove the cheesecake from the oven and let it cool at room temperature for about 30 minutes. Patience is a virtue here; the cooling process allows the cheesecake to set perfectly. After cooling, cover the cheesecake loosely with plastic wrap and refrigerate for at least two hours. Ideally, letting it chill overnight will enhance the flavor even more!
And there you have it! Your burnt basque cheesecake is ready to tantalize your taste buds. Serve with some fresh fruits or a drizzle of chocolate sauce to elevate the experience. Enjoy every creamy, decadent bite, and feel free to share this scrumptious dessert with friends and family. For more cheesecake variations, check out this article for additional inspiration!
Variations of Burnt Basque Cheesecake
Exploring the world of burnt Basque cheesecake can be an exciting culinary adventure. While the traditional version is simply divine, let’s take a look at some delightful variations that cater to different tastes and preferences.
Decadent Chocolate Burnt Basque Cheesecake
Imagine biting into a rich, creamy cheesecake with a sumptuous chocolate twist. To create this variation, add melted dark chocolate to your cheesecake batter. You can use high-quality chocolate for the best flavor. This luscious chocolate infusion complements the caramelized top beautifully, giving you a dessert that’s both indulgent and satisfying. To enhance the experience, consider serving it with a dollop of whipped cream or a sprinkle of cocoa powder.
Fresh and Fruity Burnt Basque Cheesecake
If you’re a fan of bright, fresh flavors, a fruit-topped burnt Basque cheesecake might just be your go-to. After baking, let your cheesecake cool and then crown it with seasonal fruits like berries, mangoes, or citrus slices. Not only do these toppings add a vibrant pop of color, but they also offer a refreshing contrast to the creamy texture of the cheesecake. Drizzle with honey or a berry coulis for an extra touch of sweetness and elegance.
Gluten-Free Burnt Basque Cheesecake
For those following a gluten-free diet, you’re in luck! You can easily adapt your burnt Basque cheesecake recipe by swapping out traditional flour for a gluten-free alternative like almond flour or a gluten-free all-purpose blend. This swap not only maintains the cheesecake’s creaminess but also adds a subtle nuttiness. Pair it with gluten-free cookies or a fruit compote for a delightful dessert that everyone can enjoy.
Embrace these variations to keep your baking adventures exciting. Whether you indulge in the richness of chocolate, the brightness of fruit, or the suitability of gluten-free options, there’s a perfect slice waiting for you!
Cooking tips and notes for Burnt Basque Cheesecake
Avoiding common pitfalls
Making a burnt basque cheesecake might seem daunting, but with a few tips, you can avoid any mishaps. Ensure that your ingredients are at room temperature for a smooth batter—this is crucial for that creamy texture you want. Also, be cautious not to overmix, as this can incorporate too much air and affect the final outcome. If you’re using a loaf pan, be mindful of the baking time. Every oven is unique, so keep a close eye after the 40-minute mark.
Perfecting the jiggly center
The secret to the perfect burnt basque cheesecake lies in the center. Aim for a gently jiggly consistency; it should resemble a thick, flowing custard when you gently shake the pan. Remember, it will continue to set as it cools, so don’t worry if it seems a bit underbaked. For added assurance, reference expert advice from sources like King Arthur Baking or check out New York Times Cooking for resourceful tips. Perfecting this technique is all part of the fun. Enjoy the process and savor the delightful results!
Serving Suggestions for Burnt Basque Cheesecake
Serving your burnt basque cheesecake can be a delightful experience, with plenty of ways to elevate its rich flavors. Whether you’re hosting friends or treating yourself, here are some tasty ideas to enhance your dessert.
Pairing with Fresh Fruits and Sauces
Fresh fruits can beautifully juxtapose the creamy richness of your burnt basque cheesecake. Consider topping it with:
- Berries: Strawberries, raspberries, or blueberries add a tart contrast.
- Citrus Segments: Orange or grapefruit segments lend a refreshing twist.
- Sauces: Drizzle with a homemade berry coulis or a warm caramel sauce for extra indulgence. For a quick recipe, this berry sauce guide provides easy steps.
Creative Ways to Serve
Why not get a bit creative with presentation? Here are a couple of fun ideas:
- Mini Parfaits: Layer cheesecake crumbs with yogurt and fruits in jars for charming individual servings.
- Garnish with Nuts: A sprinkle of toasted almonds or pistachios on top adds a delightful crunch and some flair.
With these serving suggestions, your burnt basque cheesecake will not only taste fantastic but also look stunning. Happy baking!
Time breakdown for Burnt Basque Cheesecake
Preparation time
The burnt basque cheesecake begins with a simple yet essential preparation phase. Set aside about 20 minutes to gather your ingredients and mix everything to creamy perfection. This is the stage where you can really get into the zone, maybe even play your favorite playlist to make the time fly!
Baking time
Once your mixture is ready, it’s time for the star of the show: baking! You’ll need approximately 50 minutes in a preheated oven. Keep an eye on it as it transforms into that beautifully caramelized top layer, which is part of its charm. Remember, this isn’t about precision—embrace the imperfections!
Chilling time
After baking, resist the urge to dig in right away! Allow your burnt basque cheesecake to chill in the fridge for at least 2 hours. This not only enhances the flavor but also helps it set to the perfect creamy consistency. Trust the process; great things take time!
For more baking tips and tricks, check out King Arthur Baking for comprehensive guides and resources.
Nutritional Facts for Burnt Basque Cheesecake
When indulging in a delightful slice of burnt basque cheesecake, it’s good to know what you’re putting into your body. Let’s break down some of its nutritional aspects:
Calories
A generous serving of this rich, creamy dessert comes in at around 350-400 calories. This makes it a decadent treat for those special occasions rather than an everyday snack.
Sugar Content
You’ll find about 28 grams of sugar in each slice. While this might seem high, it’s essential for the cheesecake’s luscious sweetness that balances out the savory notes.
Protein Content
For a dessert, the protein content isn’t too shabby! Each piece offers roughly 6-8 grams of protein, thanks to the main ingredient: cream cheese. This helps provide a bit of sustenance while you enjoy your dessert.
Feeling hungry? For more delicious dessert options that won’t derail your health goals, check out the Nutritional Guidelines from the USDA or get inspired by Healthy Dessert Recipes. It’s all about balance!
FAQs about Burnt Basque Cheesecake
What is the origin of Burnt Basque Cheesecake?
The burnt Basque cheesecake hails from the picturesque Basque region of Spain, particularly from San Sebastián. It’s said to have been created by an enterprising chef who aimed to make a creamy cheesecake but overbaked it, leading to its signature burnt top. Interestingly, this slightly flawed beauty has captured hearts worldwide for its rich flavor and unique texture. Curious to learn more about its backstory? Visit this article for deeper insights.
Why does it have a burnt top?
The charmingly charred top of a burnt Basque cheesecake is not just a happy accident; it’s integral to the recipe! The caramelization adds a delightful contrast to the creamy, custardy interior. Here’s the science: when baked at high temperatures, the sugars in the batter caramelize, giving off intense, rich flavors that enhance the overall taste experience. This technique has become a hallmark of the dessert, making it oh-so-recognizable!
Can it be made ahead of time?
Absolutely! In fact, making your burnt Basque cheesecake ahead of time can enhance its flavors. The cheesecake benefits from chilling in the fridge for at least a few hours—or even overnight—because it allows the textures to set properly. When you’re ready to serve, simply slice and present it cold, or let it sit at room temperature for a few minutes to bring back that creamy consistency. It’s a dish that not only tastes amazing but also fits seamlessly into a busy lifestyle.
If you’re eager to give it a try, check out the full recipe in our article on making a burnt Basque cheesecake in a loaf pan!
Conclusion on Burnt Basque Cheesecake
In summary, this burnt basque cheesecake has it all: decadent flavor, a wonderfully creamy texture, and a surprisingly easy preparation process. With just a few ingredients, you can whip up a delight that impresses your friends and family—perfect for gatherings or a cozy night in. After letting it cool, serve it with seasonal fruit for a refreshing twist!
Not only does this cheesecake hold its unique character, but it also invites endless variations. Why not try pairing it with your favorite coffee or tea? For more ideas, check out this guide on dessert pairings. Embrace the joy of baking and indulge in this delightful treat!
PrintBurnt Basque Cheesecake in a Loaf Pan: The Easiest Indulgence
A deliciously creamy and slightly charred cheesecake made effortlessly in a loaf pan.
- Prep Time: 15 minutes
- Cook Time: 50 minutes
- Total Time: 4 hours 5 minutes
- Yield: 8 servings 1x
- Category: Dessert
- Method: Baking
- Cuisine: Spanish
- Diet: Vegetarian
Ingredients
- 8 ounces cream cheese
- 1 cup heavy cream
- 3/4 cup granulated sugar
- 3 large eggs
- 1 teaspoon vanilla extract
- 1 tablespoon all-purpose flour
Instructions
- Preheat your oven to 400°F (200°C).
- Line a loaf pan with parchment paper.
- In a mixing bowl, beat the cream cheese until smooth.
- Add the heavy cream, sugar, eggs, vanilla, and flour, mixing until well combined.
- Pour the batter into the prepared loaf pan.
- Bake for about 40-50 minutes, until the top is dark brown.
- Let cool to room temperature before refrigerating for at least 4 hours.
- Slice and enjoy!
Notes
- For a richer flavor, use high-quality cream cheese.
- Be careful not to overbake to maintain the creamy texture.
Nutrition
- Serving Size: 1 slice
- Calories: 300
- Sugar: 20g
- Sodium: 150mg
- Fat: 25g
- Saturated Fat: 15g
- Unsaturated Fat: 10g
- Trans Fat: 0g
- Carbohydrates: 20g
- Fiber: 0g
- Protein: 4g
- Cholesterol: 120mg
Keywords: Burnt Basque Cheesecake, cheesecake, dessert, easy recipe